Showing posts with label BOM. Show all posts

Monday, July 1, 2024

July's Block!


It's so hard to believe that it's July! It has been a dryer week so far and I'm so happy to see the sunshine. Hubby spent the weekend fortifying our garden fence while I replanted green beans. I think it's the bunnies that are enjoying the fresh vegetable plants. I've never in my life bought green bean plants, I've always planted by seed, but I am determined to have fresh green beans this year. I've given up on kohlrabi... this year and I'm starting to question how much I'll really get out of the garden. We've had so much rain that the plants were drowning before the sun came out this week. I am truly hoping that I'm swamped with produce by September. I enjoy canning tomatoes and stocking up our freezer with veggies. I'm keeping my fingers crossed!

July is a fun busy month, we have the 4th of July, our wedding anniversary and our family vacation. I know that summertime is busy for everyone! So, we only have one snowman block this month so that you have time for all the other stuff. 

Here's a quick recap, if you are just discovering this year's block of the month, it’s sort of a mystery and I am encouraging everyone to use fabric from their stash. You will want the same background color for the quilt to tie it all together but, other than that the sky’s the limit. So, to begin with go dig thru your fabric stash and look for the following. 


Fabric Requirements
Blue background fabric- 2 yards
white fabric (snowman faces) - 1/2 yard
green (trees) - 3/4 yard
pieced border - red- 3/4-yard, pink - 1/2-yard, light green- 1/2-yard, light blue- 3/4-yard
orange- snowman noses
scrappy hats- 10 plus fat quarters or a combination of fat quarters and fat eights in a variety of colors such as red, blue, yellow, pink, green, purple. 

Now let's get stitching!

Snowman Hat Rectangle- Sew a background 2” square onto the top two corners right sides together corner to corner. Trim excess fabric leaving a ¼” seam. Press.


Trace 1 noses onto the paper side of the Heat N bond fusible web. (Or whatever fusible brand you prefer) Iron onto the back side of the orange fabric. Cut out all the carrot noses. Iron on carrot nose onto the snowman block using the quilt on the front cover for placement. Applique stitch using orange or brown thread around the raw edges of the carrot design. I like to use a small buttonhole stitch.
July's Block


We will wait until the quilt is completed and then quilted before we put on the snowman faces, which will use either buttons or yo-yos.
 
Tell your friends! Spread the word! Post the button on your blog!

 Each month's pattern is a free PDF instant download. If you miss a month, the patterns are available for $2.50 on my website and also in my Etsy shop.  


If you don't have a printer, you can purchase a PRINTED copy of the monthly patterns.

 There's also a Facebook Group, please join and post your progress! It's also fun to see everyone else progress too! Make sure to post your blocks so far! 

 I hope that you have a wonderful day and find some time to stitch.

Have a wonderful day,
Cindy, Josephine & Bonaparte

~ Bonaparte~ 
(Bonaparte's nickname is 'Bone')


Sunday, March 31, 2024

April's Snowmen Blocks

Happy April! A little over a week ago, mother nature played an early April Fool's joke on us and slammed us with eight plus inches of snow and super cold temperatures. Most of the snow is gone now and we had warm temperatures for Easter weekend. We had a wonderful weekend filled with family celebrations. Last evening, while relaxing I watched the Ten Commandments, the 1956 version with Charlton Heston and Yul Brynner. I grew up watching this every Easter.

We are anxiously awaiting arrival for our second granddaughter. We are hoping to meet her very soon since mom is a week overdue. It's such an exciting time for our family. Our family is growing, and we couldn't be more thrilled. 

Here's a quick recap, if you are just discovering this year's block of the month, it’s sort of a mystery and I am encouraging everyone to use fabric from their stash. You will want the same background color for the quilt to tie it all together but, other than that the sky’s the limit. So, to begin with go dig thru your fabric stash and look for the following.


Fabric Requirements
Blue background fabric- 2 yards
white fabric (snowman faces) - 1/2 yard
green (trees) - 3/4 yard
pieced border - red- 3/4-yard, pink - 1/2-yard, light green- 1/2-yard, light blue- 3/4-yard
orange- snowman noses
scrappy hats- 10 plus fat quarters or a combination of fat quarters and fat eights in a variety of colors such as red, blue, yellow, pink, green, purple. 

Now let's get stitching!

Snowman Hat Rectangle- Sew a background 2” square onto the top two corners right sides together corner to corner. Trim excess fabric leaving a ¼” seam. Press.


Trace 2 noses onto the paper side of the Heat N bond fusible web. (Or whatever fusible brand you prefer) Iron onto the back side of the orange fabric. Cut out all the carrot noses. Iron on carrot nose onto the snowman block using the quilt on the front cover for placement. Applique stitch using orange or brown thread around the raw edges of the carrot design. I like to use a small buttonhole stitch.

We will wait until the quilt is completed and then quilted before we put on the snowman faces, which will use either buttons or yo-yos.
 
Tell your friends! Spread the word! Post the button on your blog!

 Each month's pattern is a free PDF instant download. If you miss a month, the patterns are available for $2.50 on my website and also in my Etsy shop.  


If you don't have a printer, you can purchase a PRINTED copy of the monthly patterns.

 There's also a Facebook Group, please join and post your progress! It's also fun to see everyone else progress too! Make sure to post your blocks so far! 

I'm now off to my sewing room to do some sewing, I've got a quilt to piece together along with some embroidery to do!

Have a wonderful day,
Cindy and Josephine

Thursday, February 29, 2024

March's Blocks!

Happy March! The temperature has been crazy here. We went from a 60-degree day down to below zero in a 24-hour period! As I write this, we are slowly warming up again giving us hope that spring is right around the corner. I've bought my garden seeds and I plan on getting them started indoors. I'm on the hunt for my grow lights, they are somewhere in the house... hmmmm where did I put them! I have a garden I would like to totally dig up and redo, I've been kicking around what I would like to plant in that space. It's gone from a shade garden to 100% sun with the loss of an oak tree. Along with my garden plans, I am excited about the arrival this month of a new granddaughter! We can't wait to meet her! Such an exciting time... I had all boys so it's so much fun to have granddaughters. I am enjoying spoiling them both! 

Now onto this year’s block of the month in case you are just joining us, it’s sorta a mystery and I am encouraging everyone to use fabric from their stash. You will want the same background color for the quilt to tie it all together but, other than that the sky’s the limit. So, to begin with go dig thru your fabric stash and look for the following.


Fabric Requirements
Blue background fabric- 2 yards
white fabric (snowman faces) - 1/2 yard
green (trees) - 3/4 yard
pieced border - red- 3/4-yard, pink - 1/2-yard, light green- 1/2-yard, light blue- 3/4-yard
orange- snowman noses
scrappy hats- 10 plus fat quarters or a combination of fat quarters and fat eights in a variety of colors such as red, blue, yellow, pink, green, purple. 

Now let's get stitching!

Snowman Hat Rectangle- Sew a background 2” square onto the top two corners right sides together corner to corner. Trim excess fabric leaving a ¼” seam. Press.


Trace 2 noses onto the paper side of the Heat N bond fusible web. (Or whatever fusible brand you prefer) Iron onto the back side of the orange fabric. Cut out all the carrot noses. Iron on carrot nose onto the snowman block using the quilt on the front cover for placement. Applique stitch using orange or brown thread around the raw edges of the carrot design. I like to use a small buttonhole stitch.

We will wait until the quilt is completed and then quilted before we put on the snowman faces, which will use either buttons or yo-yos.
 
Tell your friends! Spread the word! Post the button on your blog!

 Each month's pattern is a free PDF instant download. If you miss a month, the patterns are available for $2.50 on my website and also in my Etsy shop.  


If you don't have a printer, you can purchase a PRINTED copy of the monthly patterns.

 There's also a Facebook Group, please join and post your progress! It's also fun to see everyone else progress too! Make sure to post your blocks so far! 

I'm now off to my sewing room to do some sewing, I'm working on some new applique ideas, working on some patterns and also making baby blankets in between it all.

Have a wonderful day,
Cindy and Josephine

Wednesday, March 1, 2023

March's Block ~ Santas Journey BOM


Happy March 1st! We still have a ton of snow here in Minnesota, lots of ice too. I've fallen once this winter and I don't want to slip again. I have been tearing the house apart trying to find my cleats for walking on ice. I have no idea where they are, I have torn thru several closets! I sure hope they didn't end up in a Good Will box! So, I've been walking around like a little penguin when I'm outside. It's great weather for staying inside to sew and quilt. I am also going to take advantage of the crappy weather to take time to organize my studio and go thru my fabric to make room for NEW.  So, I'll be putting together USPS priority mail flat rate boxes with lots of fabric goodness and post them on my Etsy site. Keep an eye out for that. There'll be some great deals!

This month's block is also an easy one, a little green house. There's an upstairs light on, are the kids already up! As a kid, I remember getting up well before 5am to check to see if Santa had come. I'm surprised I didn't pass him in the hallway for how early it was! Sometimes I would get up and peek and then go back to bed, other times I would quietly snoop thru my Christmas stocking, waiting for my sisters to get up too. Let me show you how I put this month's block together. It's just like last month's, just switching up the house color for this block.
Make sure to download a copy of the pattern for February and gather your fabric.

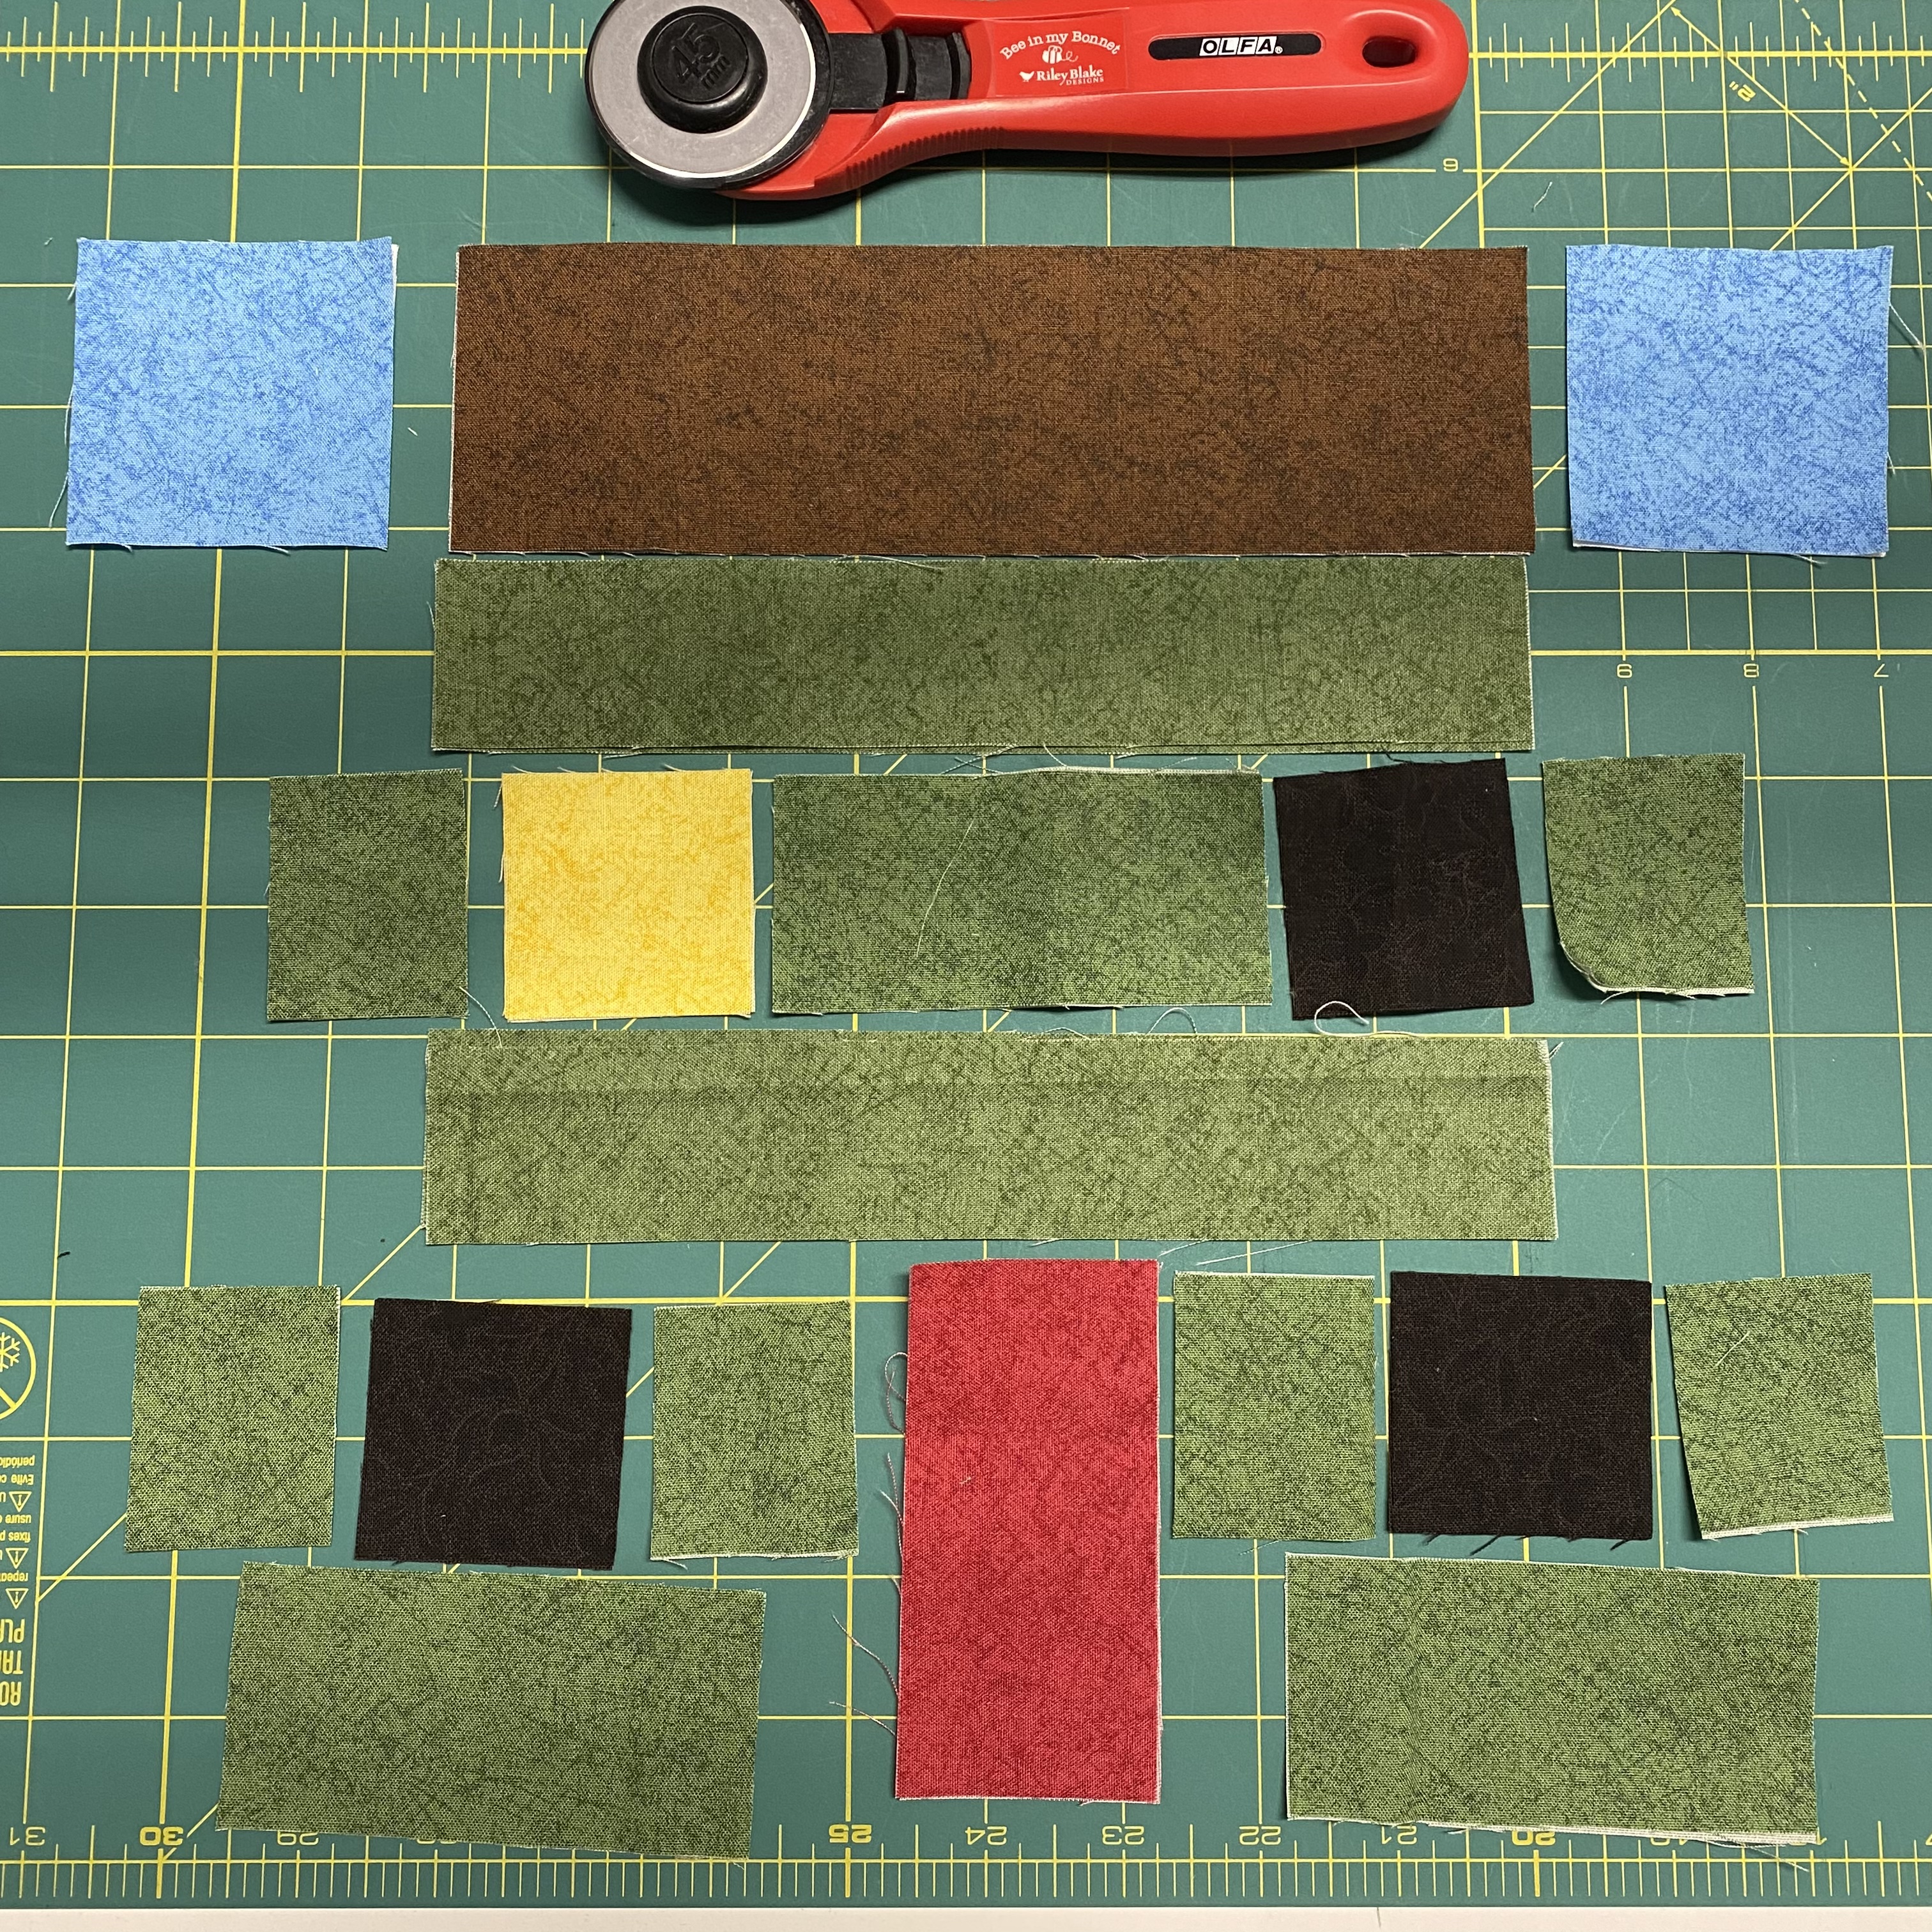
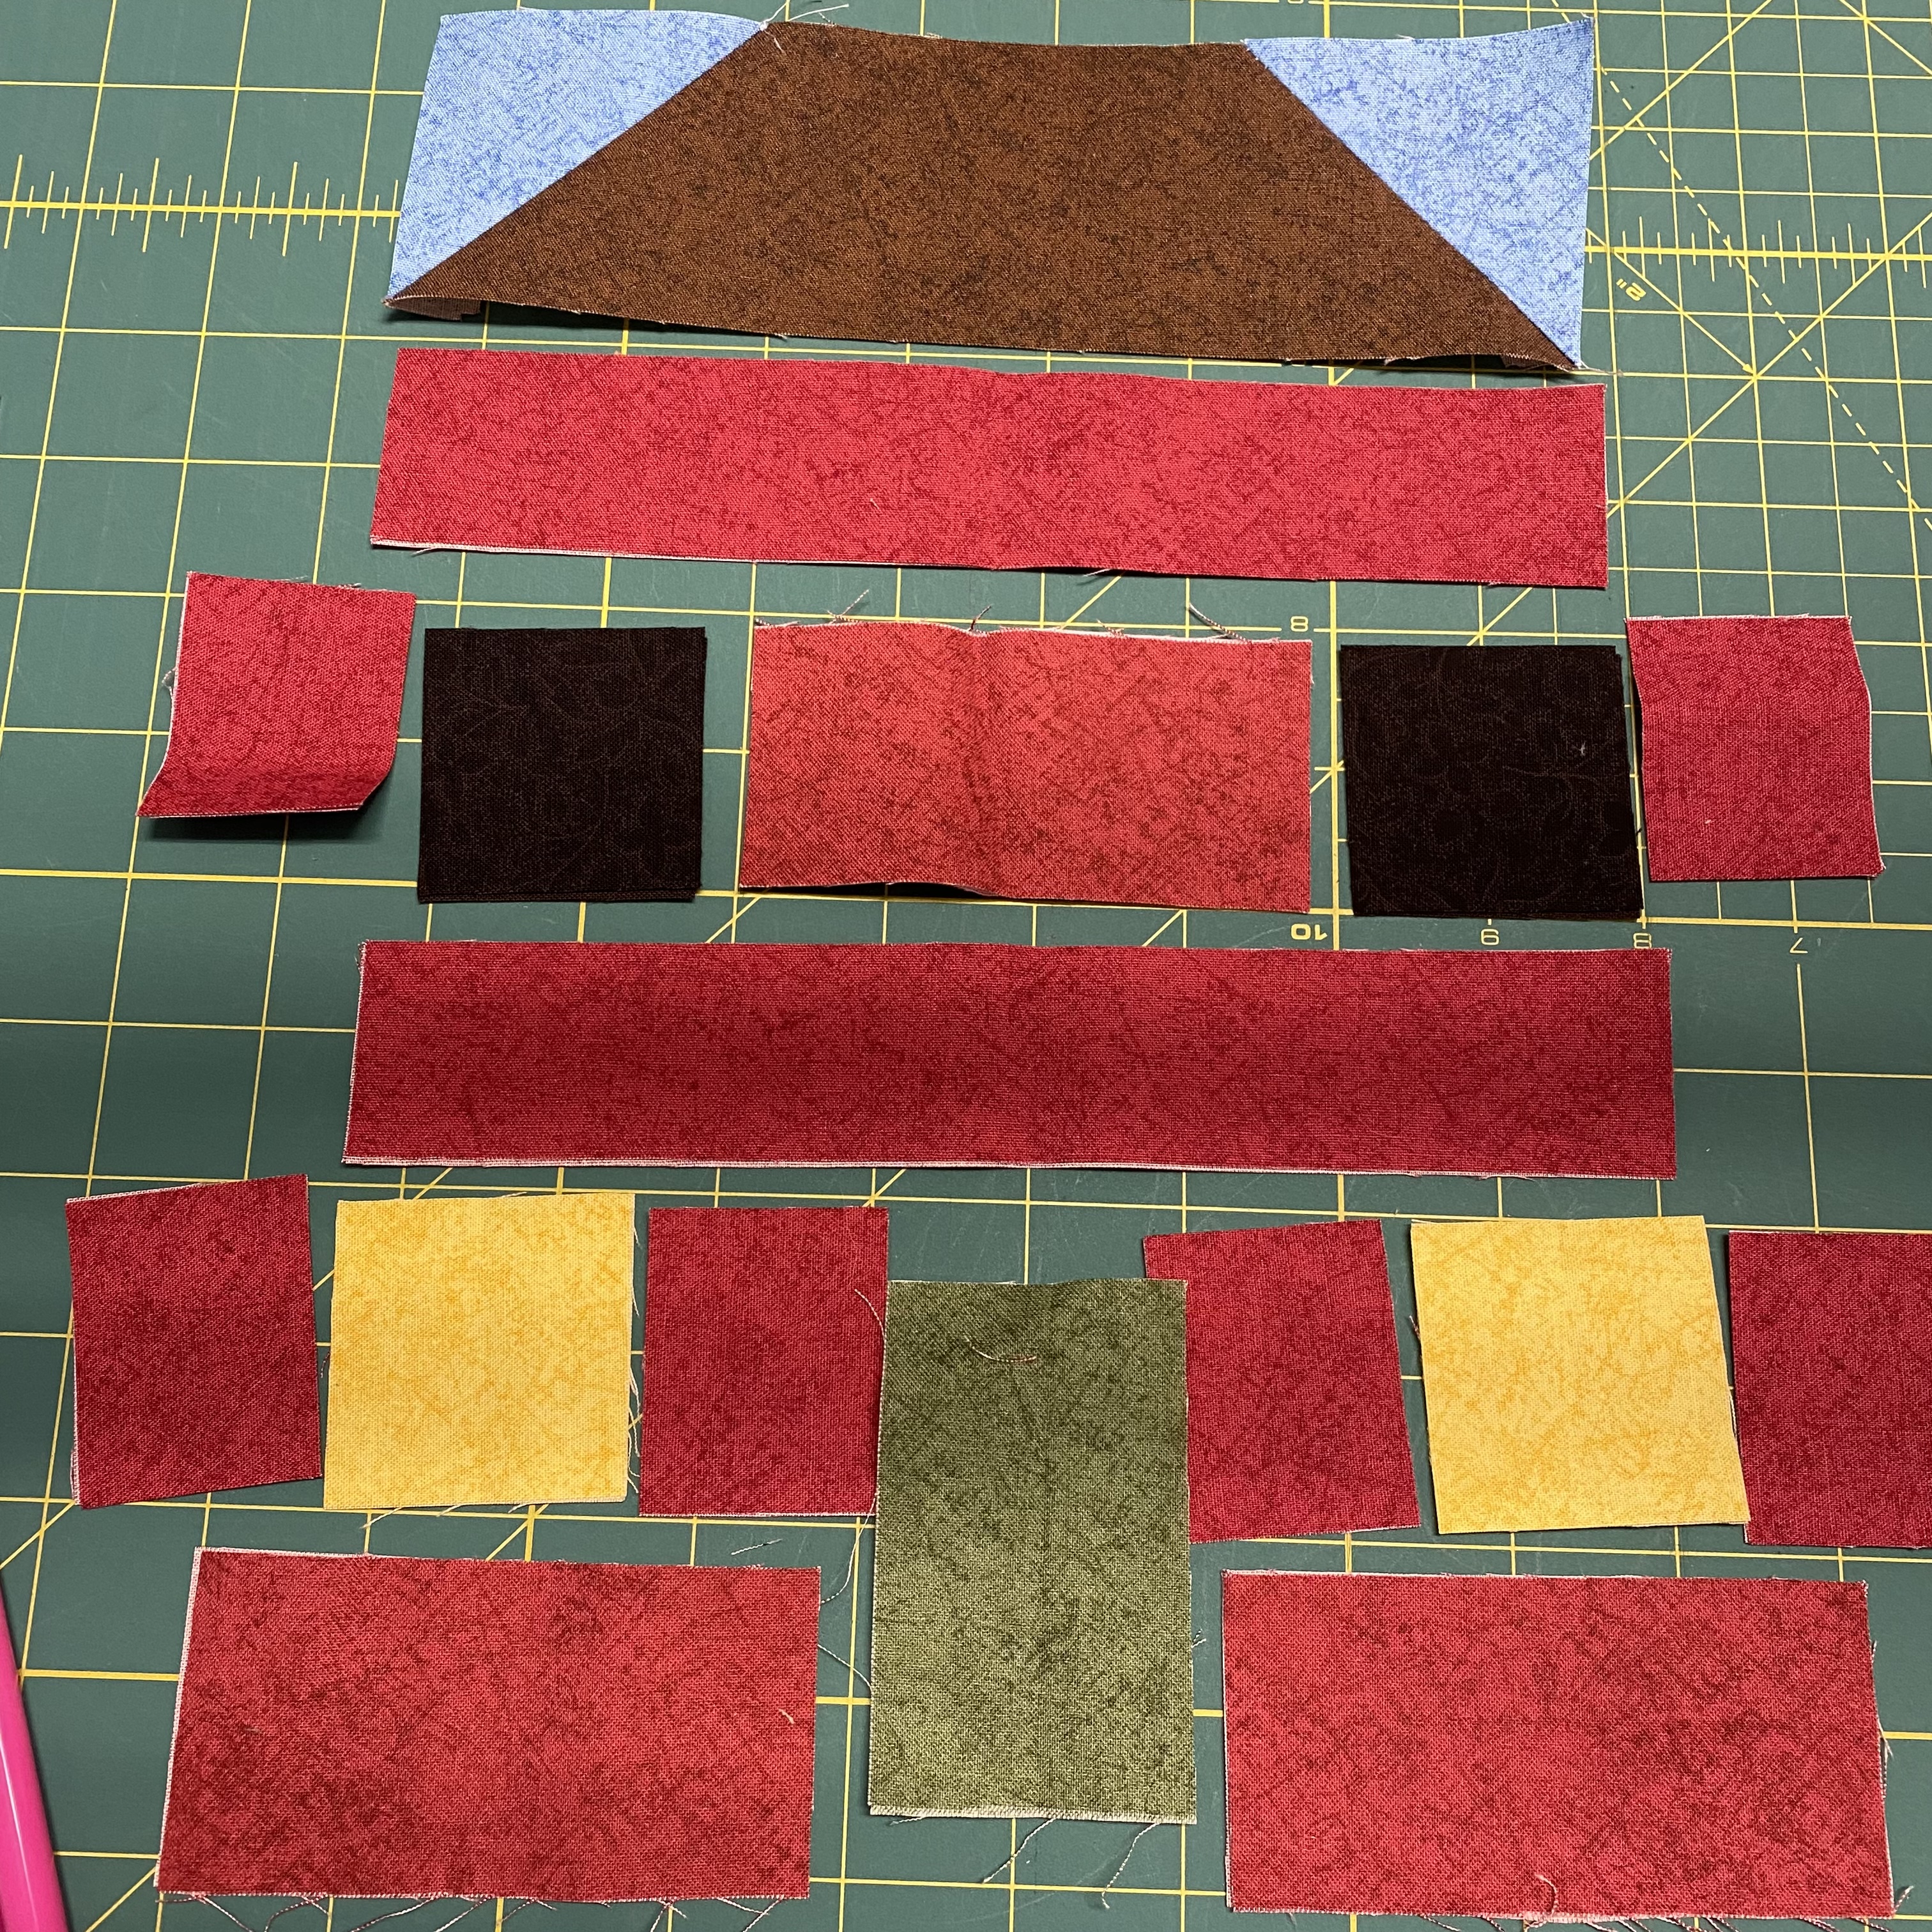
·         Pair together blue A square with brown B rectangle, right sides together. Sew corner to corner diagonally. Trim to a ¼” seam on one side to form a triangle on the left side of the ‘roof’. Press to the dark side. Pair together the blue C square on the other side of the brown B rectangle, right sides together. Sew corner to corner diagonally to form the right side of the roof. Press to the dark side.


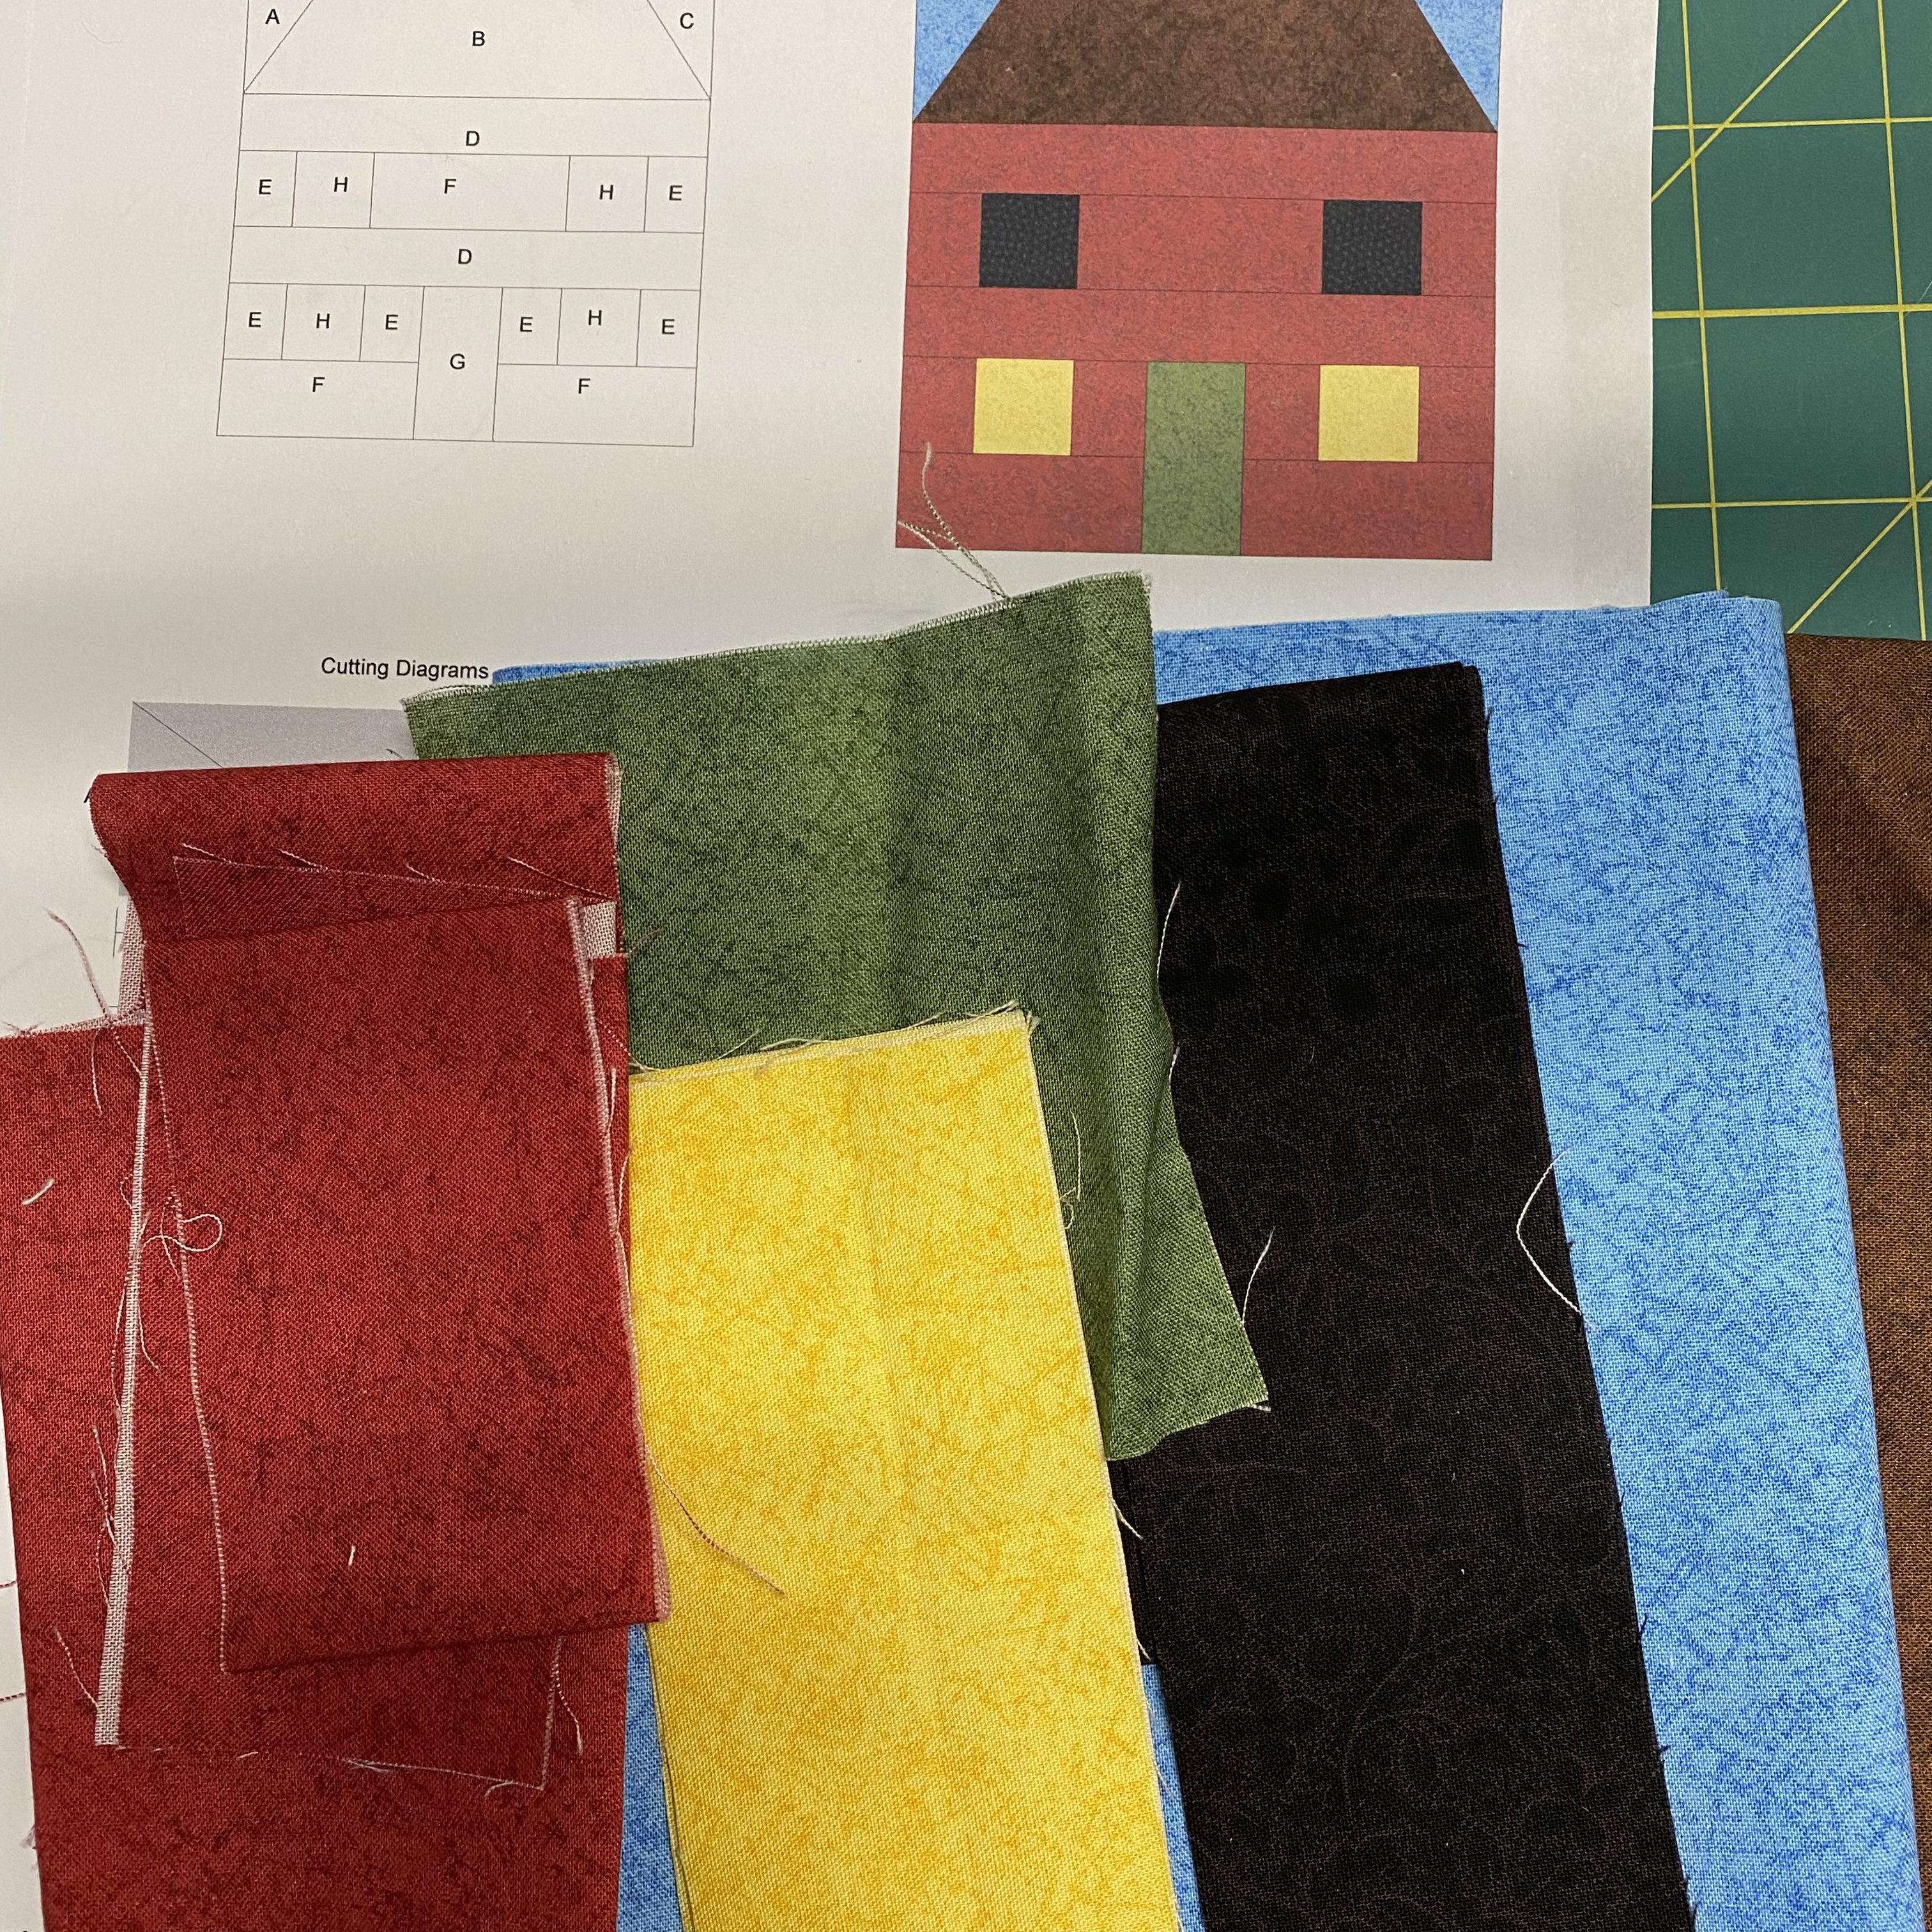
Following the block layout, lay out all of the pieces to the house block. Following the layout and picture on the pattern. 

Following the layout and picture, stitch the block together using a scant ¼” seam.

I stitch the 'rows' first, and then pieced the lower window sections together. Remember to use a scant quarter inch seam. Sew the rows and window door sections together to form the block. Iron. Block should measure 8 1/2" x 8 1/2". You will make only one this month.


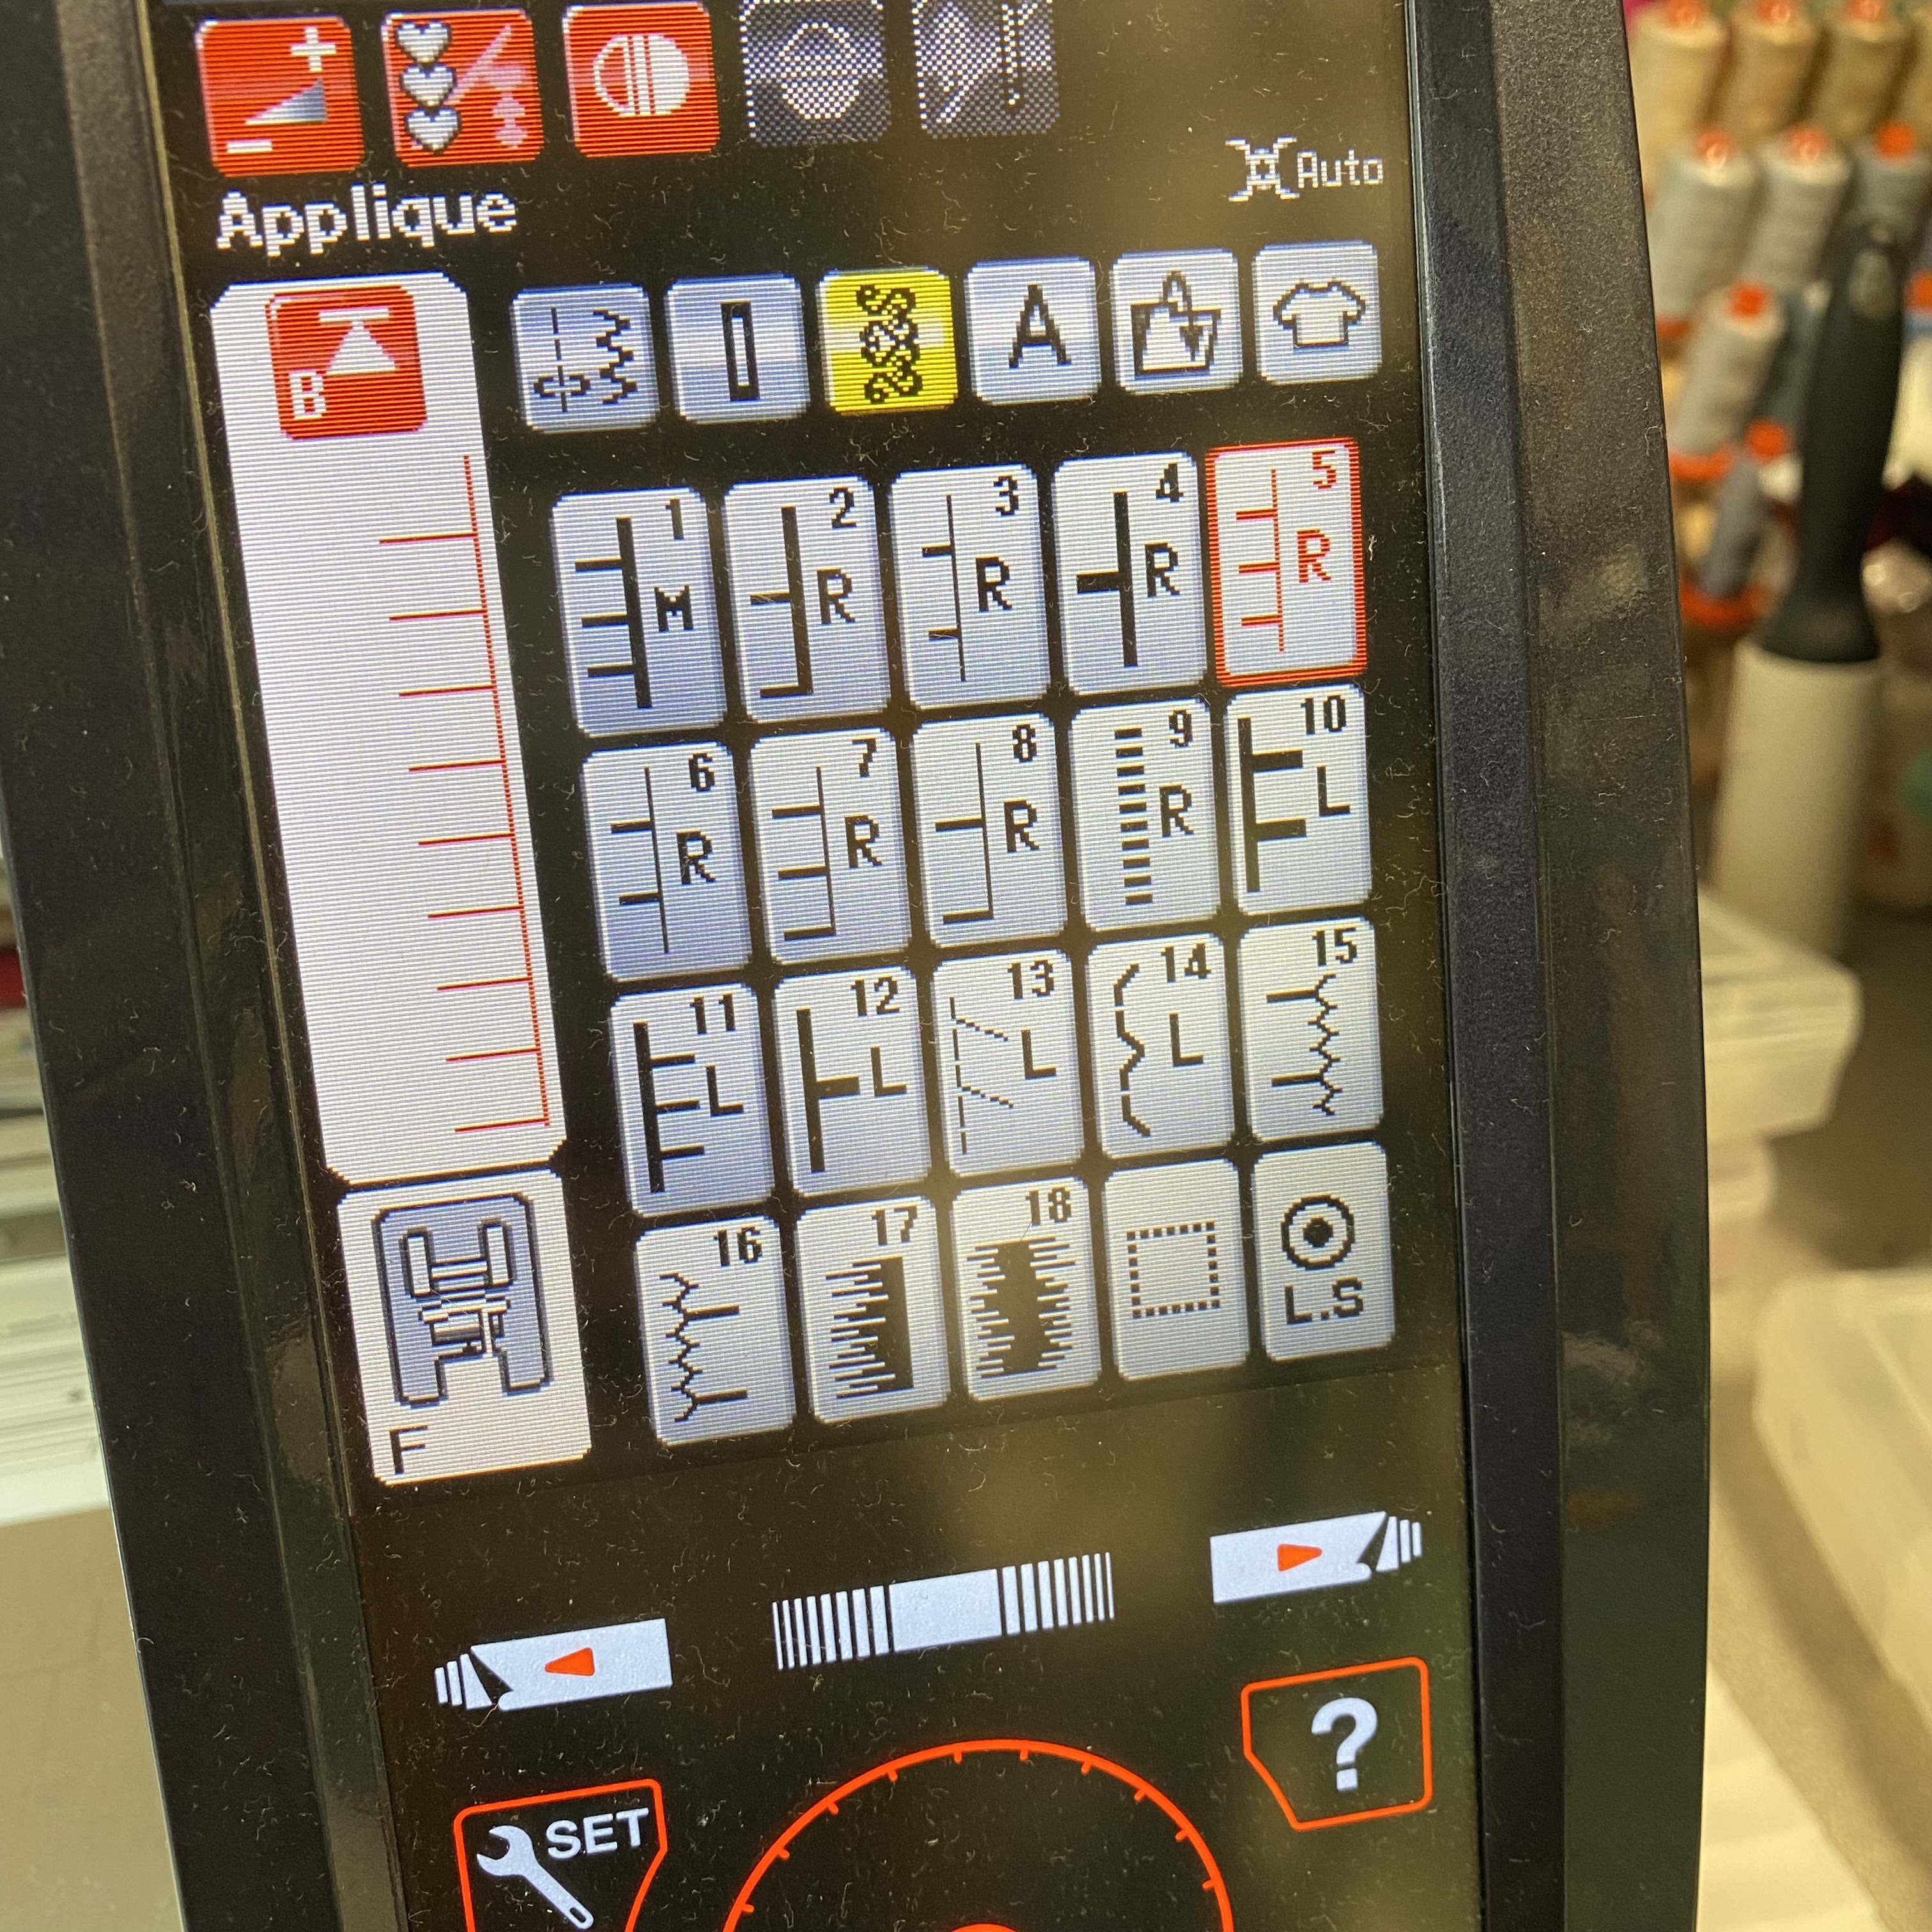
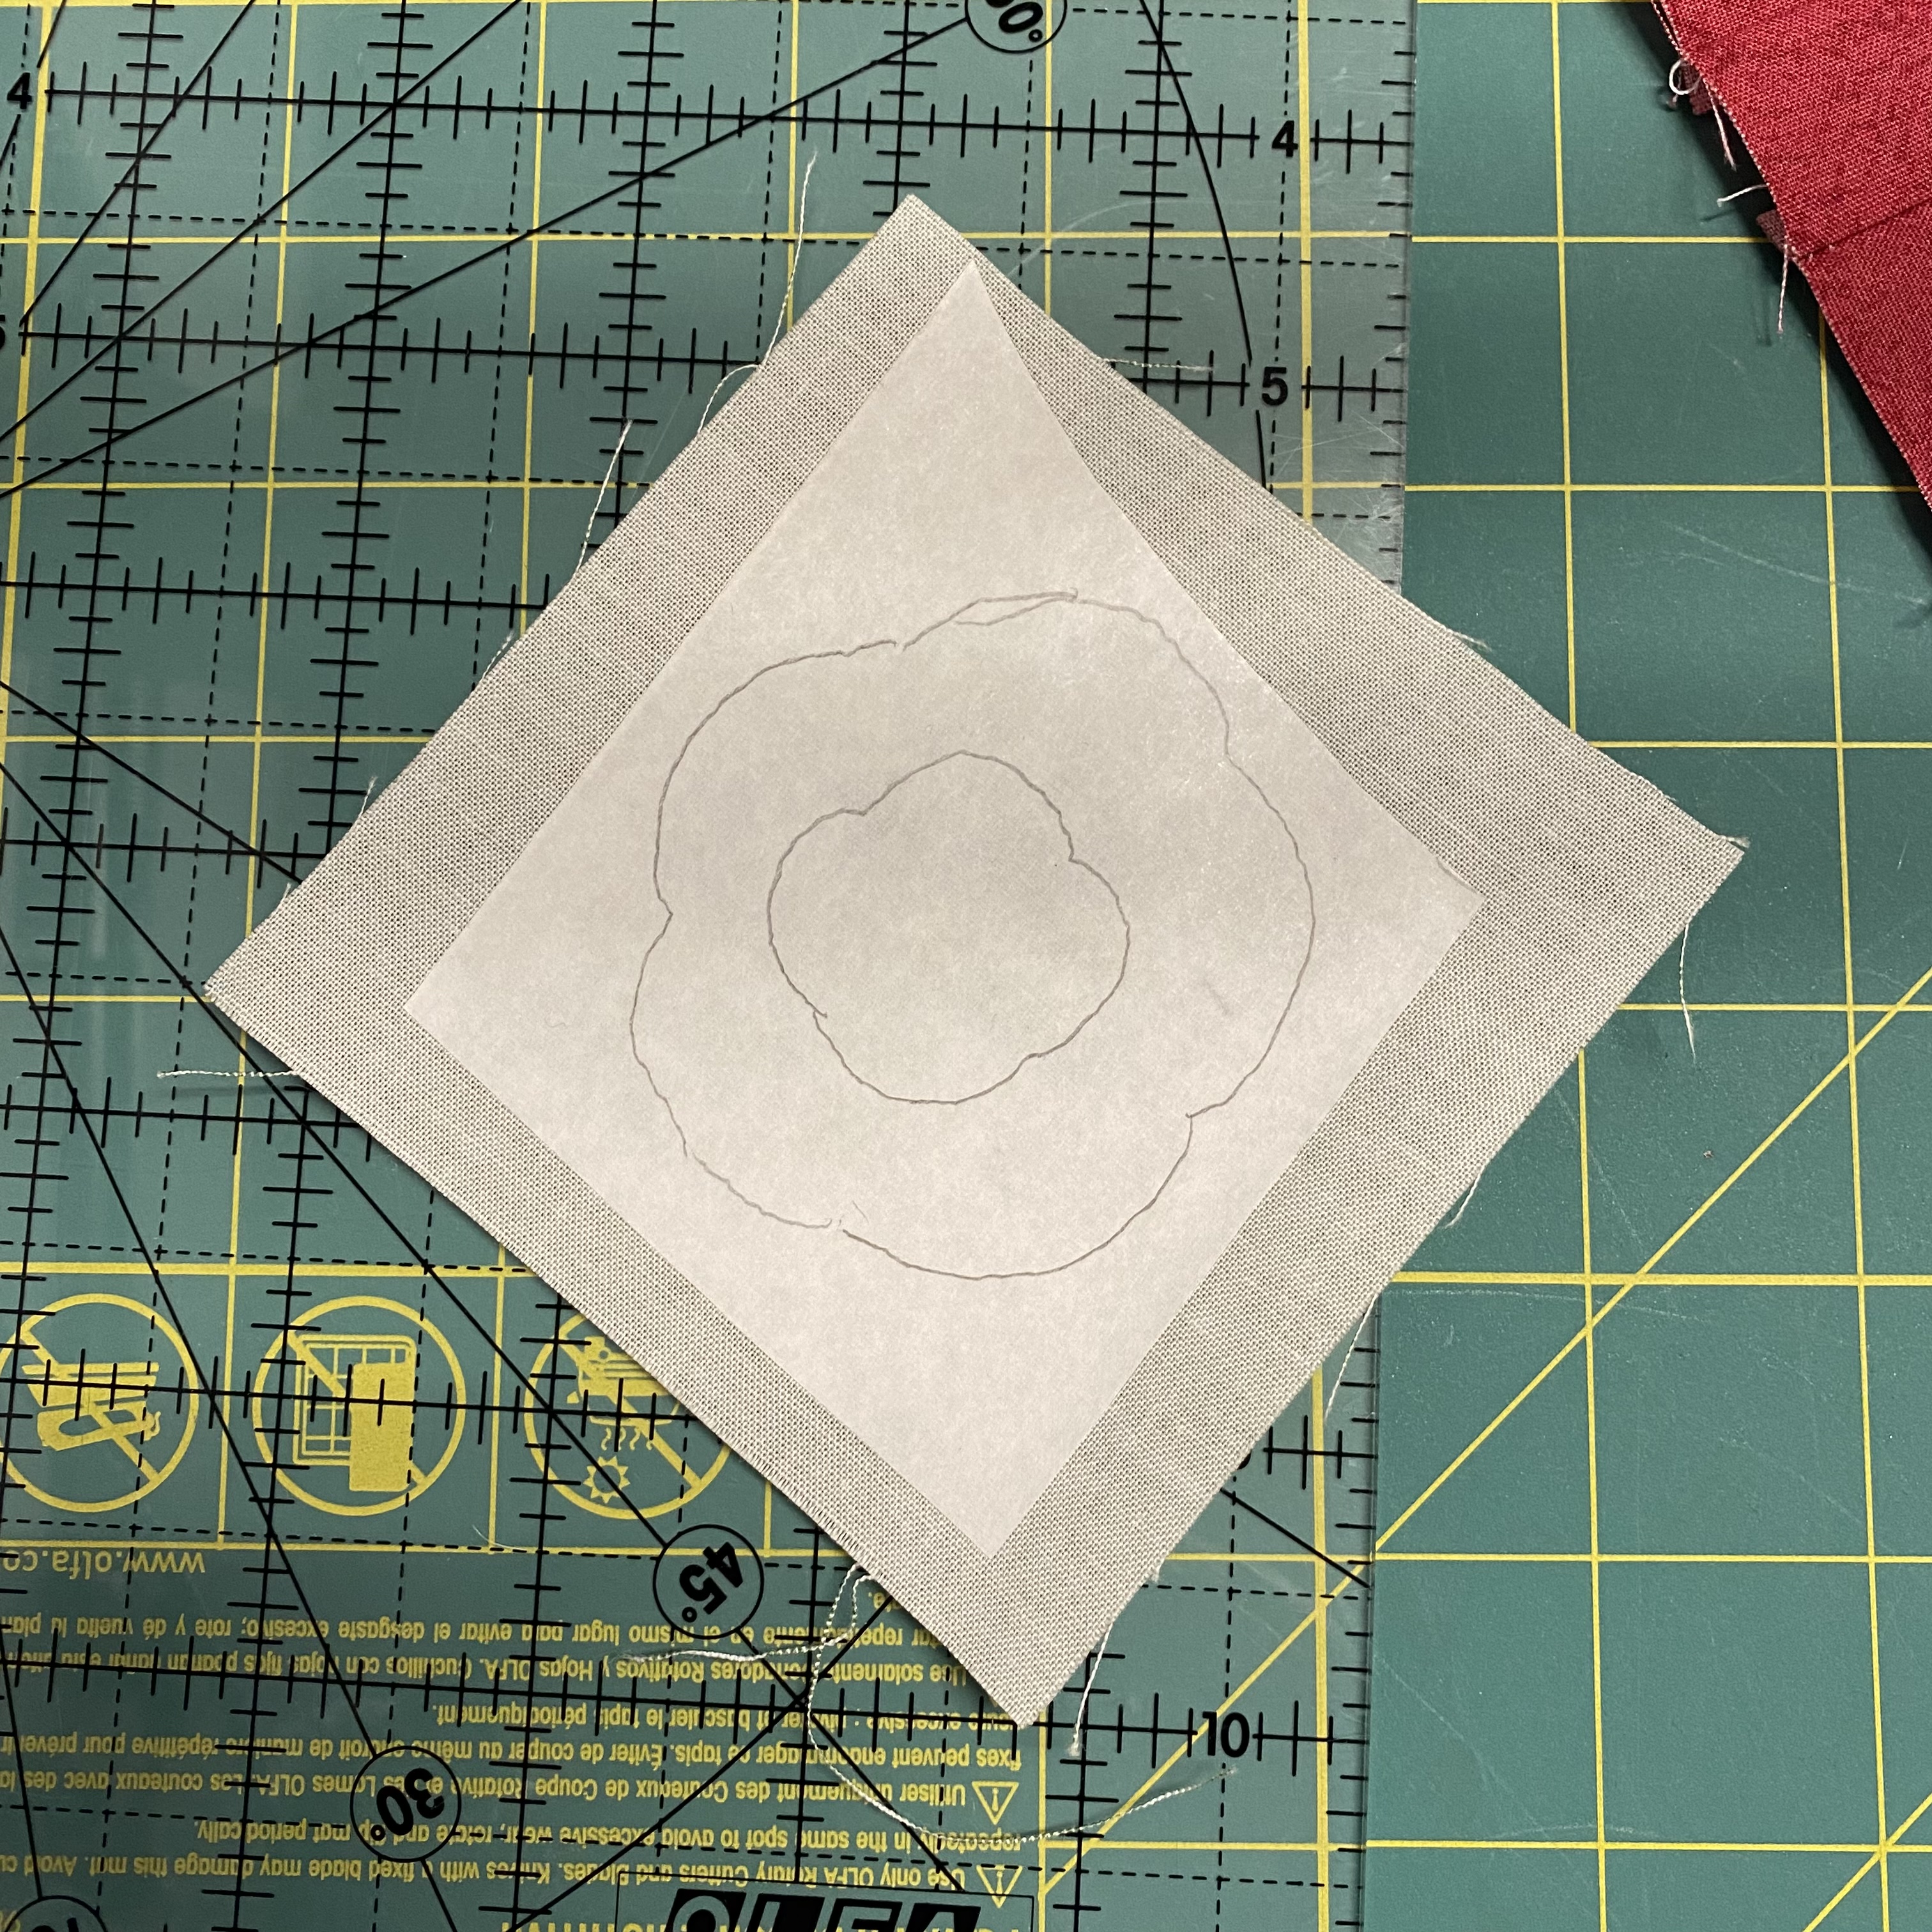
 Trace the wreath shape onto the paper side of a piece of fusible web. Following the manufacturer's instructions. Iron the fusible web to the wrong side of a square of green fabric. Cut the applique design out. Peel off the paper and iron onto the house block centering it above the door between the two upper windows. Using a blanket stitch and green thread, stitch around the design

I took a picture of the stitch that I'm using to applique around the wreath shape. This is helpful so in case I forget what I used I have a record of it on my phone.

~ Green House ~

 I will be embellishing the wreath and door with buttons for the doorknob and holly berries but will hold off until the quilts are quilted. There's nothing like trying to work around buttons while quilting.

 Help spread the word and tell all your quilting friends about this fun wintery block of the month! Each month we will work on a new section of this mystery quilt. There's basic piecing, some applique and other fun embellishments. As always, the monthly directions will be free during that month and then available for a small fee after that.
Finished measurements of the 2023 BOM quilt is 60" x 70"

Grab the button and link it to the Quilt Doodle Blog and help spread the word! 

I will be doing two versions of this quilt as we sew along. The blue version and then a white one. It will be the same pattern just a different background. Make sure to download the PDF directions on the website. Grab your fabric and start sewing!

 Each month's pattern is a free PDF instant download. If you miss a month, the patterns are available for $2.50 on my website and also in my Etsy shop.  


If you don't have a printer, you can purchase a PRINTED copy of the monthly patterns.

 There's also a Facebook Group, please join and post your progress! It's also fun to see everyone else progress too! Make sure to post your blocks so far! 

I hope that you all have a wonderful day and find some time to do some stitching! I'm planning on going thru my studio. Stayed tuned, I'll be posting some fabric bundles on my Etsy site at clearance prices to make room for some new fabric which will be on the way very soon!

Happy quilting,
Cindy and Josephine


Wednesday, February 1, 2023

February's Block ~ Santa's Journey


It's February! It's starting to warm up here in Minnesota after a week of below zero temperatures. Poor Josephine hates the cold weather and so do I. The cold temperatures are only tolerable if you are planning on staying home with a good book, a cozy quilt and a blazing fireplace. I envy all of the snowbirds out there that are basking in the sunshine and warm weather! I would love an above freezing day! 
 This month's block is an easy one, a little red house. The downstairs lights are on while parents are preparing for Christmas and the upstairs lights are off since the little kiddos are tucked in their beds dreaming of Christmas morning. Let me show you how I put this month's block together. 
 
Make sure to download a copy of the pattern for February and gather your fabric.

Following the block layout, lay out all of the pieces to the house block. Following the layout and picture on the pattern.

·         Pair together blue A square with brown B rectangle, right sides together. Sew corner to corner diagonally. Trim to a ¼” seam on one side to form a triangle on the left side of the ‘roof’. Press to the dark side. Pair together the blue C square on the other side of the brown B rectangle, right sides together. Sew corner to corner diagonally to form the right side of the roof. Press to the dark side.


 Following the layout and picture, stitch the block together using a scant ¼” seam.


I stitch the 'rows' first, and then pieced the lower window sections together. Remember to use a scant quarter inch seam. Sew the rows and window door sections together to form the block. Iron. Block should measure 8 1/2" x 8 1/2". You will make only one this month.

 Trace the wreath shape onto the paper side of a piece of fusible web. Following the manufacturer's instructions. Iron the fusible web to the wrong side of a square of green fabric. Cut the applique design out. Peel off the paper and iron onto the house block centering it above the door between the two upper windows. Using a blanket stitch and green thread, stitch around the design. I haven't gotten to stitch around the wreath yet. 


~ Red House Block ~

I'm making two versions of this quilt, one with the blue fabric background and one with the white fabric background. Also on a special note, I will be embellishing the wreath and door with buttons for the doorknob and holly berries but will hold off until the quilts are quilted. There's nothing like trying to work around buttons while quilting.

 Help spread the word and tell all your quilting friends about this fun wintery block of the month! Each month we will work on a new section of this mystery quilt. There's basic piecing, some applique and other fun embellishments. As always, the monthly directions will be free during that month and then available for a small fee after that.
Finished measurements of the 2023 BOM quilt is 60" x 70"

Grab the button and link it to the Quilt Doodle Blog and help spread the word! 

I will be doing two versions of this quilt as we sew along. The blue version and then a white one. It will be the same pattern just a different background. Make sure to download the PDF directions on the website. Grab your fabric and start sewing!

 Each month's pattern is a free PDF instant download. If you miss a month, the patterns are available for $2.50 on my website and also in my Etsy shop.  


If you don't have a printer, you can purchase a PRINTED copy of the monthly patterns.

 There's also a Facebook Group, please join and post your progress! It's also fun to see everyone else progress too! Make sure to post your blocks so far! 

I hope that you all have a wonderful day and find some time to do some stitching! I'm planning a few days watching my little sweetie. I plan on having some hand stitching with for when she naps. 

Happy quilting,
Cindy and Josephine


Friday, December 2, 2022

Have you heard?


 Come and join the fun January 1, 2023! Help spread the word and tell all your quilting friends about this fun wintery block of the month! Each month we will work on a new section of this mystery quilt. There's basic piecing, some applique and other fun embellishments. As always, the monthly directions will be free during that month and then available for a small fee after that.
Finished measurements of the 2023 BOM quilt is 60" x 70"


Quilt kits will be available, make sure to pre-order yours now so you have your fabric in time for our quilty adventure. Kits will begin shipping out by December 15th (if not sooner) USA only. Kits include a total of 8 yards of fabric of all the fabric you need to complete the top and binding for the quilt. Fabric is 100% cotton and from Marcus Fabrics by Quilt Doodle Designs.

Pre-order your kits HERE

Grab the button and link it to the Quilt Doodle Blog and help spread the word! 

I'm looking forward to seeing you January 1st for the first section of the Santa's Journey Mystery BOM 2023!


Happy Quilting,

Cindy and Josephine

Wednesday, November 30, 2022

Decembers Block - Winter Cardinals

December is here and so is the final block for this year's BOM. The year has flown by! I want to say thank you for following along and sewing along with me. I have enjoyed hearing from you and seeing your progress as we have stitched along together.

The final block features a couple of cardinals in winter. I have filled up the feeders with a fruit and nut blend and I have enjoyed seeing the cardinals show up. They are so beautiful against the white snow. Yes, it has snowed here in Minnesota, it's cold! Hubby has turned down the thermostats here to save on the heating bill. I'm freezing.... so cold.... glad to have my quilts to snuggle under. Sad part is we haven't even gotten to the coldest part of winter.... uggg. 

 So let me show you how I have made this month's block. Go on over to the Website and download the PDF pattern. The links are below towards the end of the posting. Make sure that your email is correct so that the link for the pattern is sent to you. Also, if you don't find it, check your trash or spam folder just in case it ended up in there....

Print up the pattern and gather your fabric for your applique block.


Trace the applique shapes onto the paper side of your fusible web. I use Flexifuse. I then group the shapes using the same color with the fabric.


Group the shapes with the fabric colors. Following the manufacturer directions, I then iron the fusible web onto the backside of my fabric. 

Cut all of the shapes out. Following the pattern placement sheet, position all the applique shapes on the cream background rectangle. Some of the shapes overlap. Iron everything in place. Your block is now all ready to be appliqued. I used dark brown thread and an applique buttonhole stitch to stitch around everything. 

~ Winter Cardinals ~

If you have been following along, you just need to download the assembly PDF once you are done with this month's block. You should have everything ready to sew together and then just add the border and your quilt top will be complete!
Feathered Friends BOM 2022 Quilt


Announcement!!!!
All of the block directions and the final assembly can be found on the website under the BOM tab. The border blocks and final assembly are all free downloads until January 1st. 

 The finished size of the quilt is 58" x 65" Each month's pattern is a free PDF instant download. If you miss a month, the patterns are available for $2.50 on my website and also in my Etsy shop.  

If you don't have a printer, you can purchase a PRINTED copy of the pattern

 There's also a Facebook Group, please join and post your progress! It's also fun to see everyone else progress too! Make sure to post your blocks so far! 
Post your pictures of your finished quilt top thru January 15th for a chance to win a few giveaways. 
 Make sure to stayed tuned for that!

I hope that you all have a wonderful day and find some time to do some stitching! I've always got a long list of items I'd like to make for the holidays, I'm going to take some time to work on a few more projects. Let's see if Josephine lets me. Her new trick is to jump up on my lap to snuggle, even if I'm sitting at the computer or sewing machine.  

Happy quilting,
Cindy and Josephine


Friday, November 18, 2022

Double Monkey Wrench Block - Feathered Friends BOM 2022

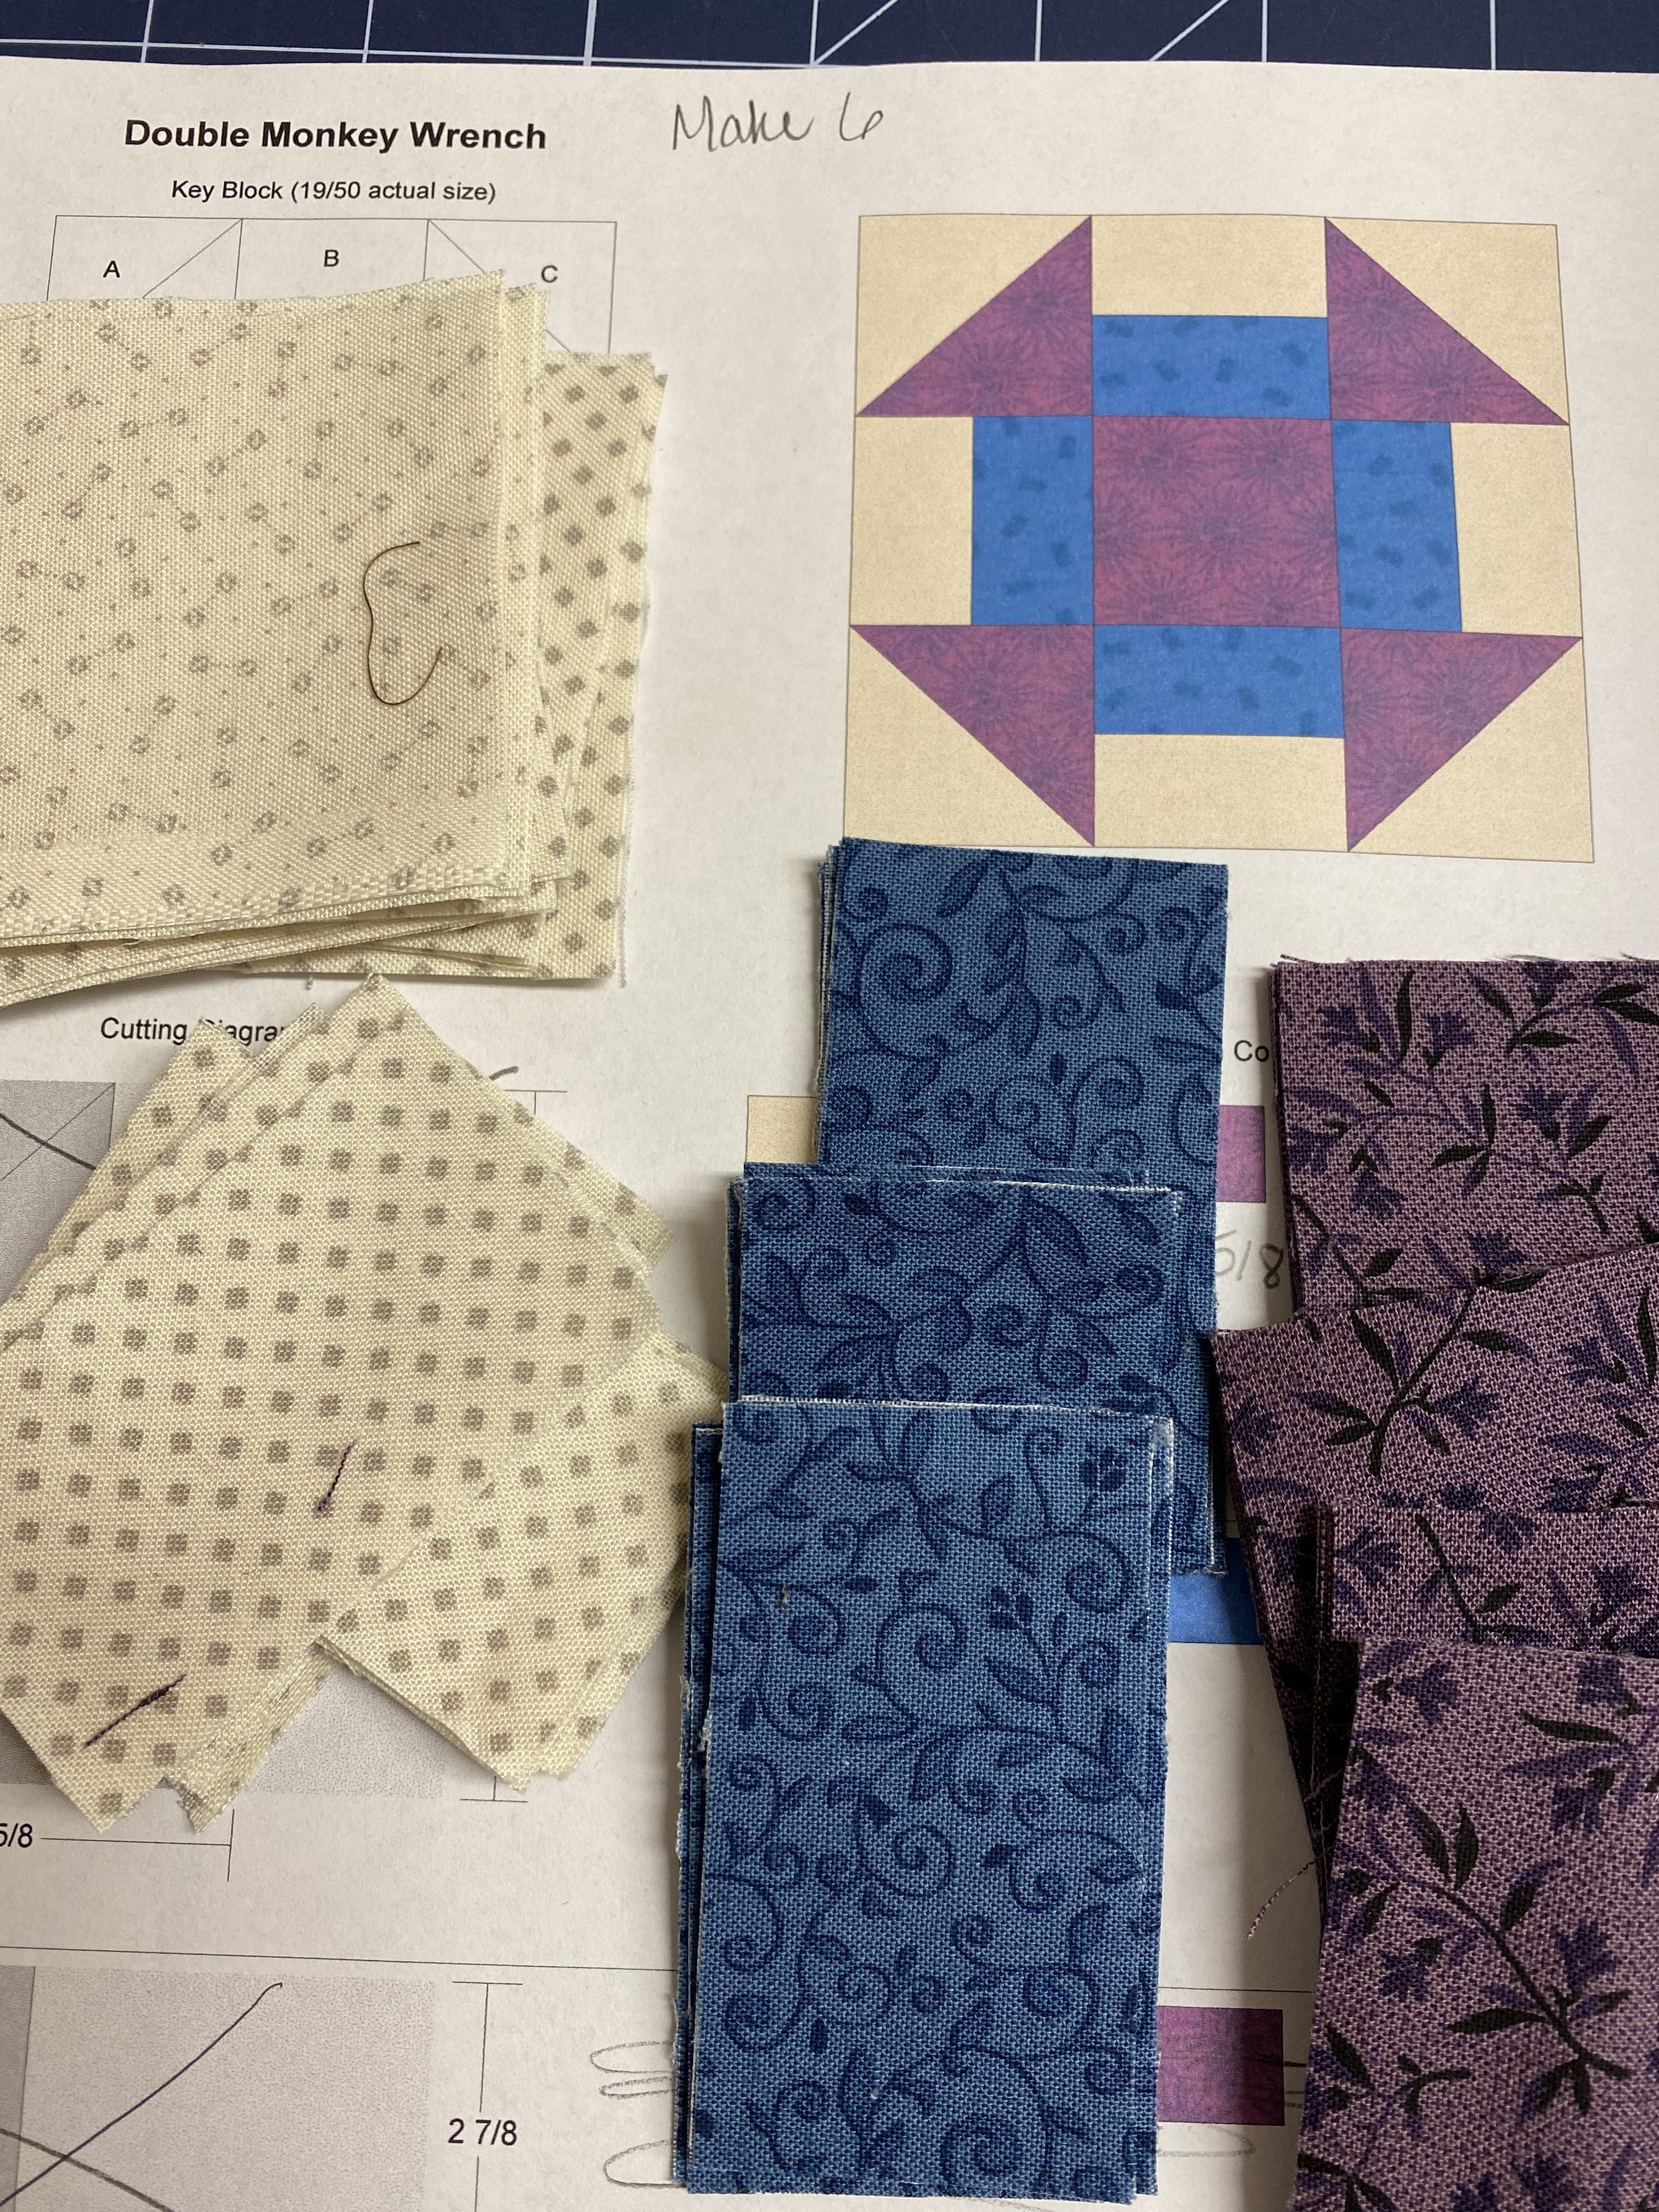
Our Feathered Friends quilt has two rows of blocks to frame the quilt. Today we will make 6 Double Monkey Wrench blocks. This is a fun traditional block. This is the last of the block series for this quilt. I am using a purple and blue and cream fabric for my blocks. If you are making your quilt out of your stash, find fabrics colors that can be found in your applique blocks. This will help to pull your quilt together. For my cream fabrics, I choose a different fabric for each block to make it scrappy.  The quilt block patterns will be available free until the end of the year.

 So let me show you how I have made the Double Monkey Wrench block. Go on over to the Website and download the PDF pattern. The links are below towards the end of the posting. Make sure that your email is correct so that the link for the pattern is sent to you. Also, if you don't find it, check your trash or spam folder just in case it ended up in there....
Gather your fabric and print up your pattern.

From dark fabric cut-

24- 2 5/8” x 2 5/8” squares (A)

6- 2 5/8” x 2 5/8 squares (C)

From coordinating fabric cut- 24- 1 5/8” x 2 5/8” rectangles (B) 

From light fabric cut-

24- 2 5/8” x 2 5/8” squares (A)

24- 1 5/8” x 2 5/8 squares (B)


·         Pair together light A square with dark B square right sides together. Sew corner to corner diagonally. Trim to a ¼” seam on one side to form a triangle square. Press to the dark side.  Make 24 triangle squares total, 4 for each block.


·         Pair together light B rectangle with coordinating B rectangle right sides together. Sew along the long edge using a ¼” seam. Press to the dark side. Trim up to measure 2 5/8” x 2 5/8” squares. Make a total of 24 rectangle squares. Four for each block.


     Following the block layout, stitch the block together using a scant ¼” seam.

I find it helpful to lay the block out next to my sewing machine. Make 6 Monkey Wrench blocks total.
Now this is exciting, go gather your nine patch, friendship star and double monkey wrench blocks. If you have all of the blocks done you can sew together the top and bottom border for the quilt. The order is above.... You will make 2 - 8 block strips for the top and bottom border for the quilt.

Announcement!!!!
I will be releasing the other pieces and parts that you need to complete this quilt throughout this month. Stay tuned! Visit the Quilt Doodle website for the free PDF downloads for the quilt blocks and sashing directions.

It's an adorable quilt when it is done. The finished size of the quilt is 58" x 65" Each month's pattern is a free PDF instant download. If you miss a month, the patterns are available for $2.50 on my website and also in my Etsy shop.  

If you don't have a printer, you can purchase a PRINTED copy of the pattern

 There's also a Facebook Group, please join and post your progress! It's also fun to see everyone else progress too! Make sure to post your blocks so far! 

 There isn't much left to make for this quilt. There is one more bird block that will be available December 1st. I will also release the border and assembly directions at that time too. I hope that you all have a wonderful day and find some time to do some stitching! I'm off to spend some time in my sewing room, I have a stack of Christmas projects.

Happy quilting,
Cindy and Josephine