Showing posts with label #marcusfabrics #Marcusdesigner #tutorial #applique #quilting. Show all posts

Thursday, May 2, 2024

May's Blocks!


April showers bring May flowers, we're so happy spring is here and I'm ready to visit some greenhouses and plant some flowerpots. It's also been raining like crazy, and I would love to see the sunshine for a change. It's also been pretty busy around here with the new arrival of our newest granddaughter, she's a doll! I'm such a spoiled grandma! I get to spend time almost every day rocking her to sleep. We are smittened with miss Eleanor. I call her Ellie. Mom and dad live with us while they save and look for a house. I'm pretty lucky to be able to see Ellie every day, it's such a blessing. Now on to this month's block for the Snowman Forest BOM quilt.

Here's a quick recap, if you are just discovering this year's block of the month, it’s sort of a mystery and I am encouraging everyone to use fabric from their stash. You will want the same background color for the quilt to tie it all together but, other than that the sky’s the limit. So, to begin with go dig thru your fabric stash and look for the following.


Fabric Requirements
Blue background fabric- 2 yards
white fabric (snowman faces) - 1/2 yard
green (trees) - 3/4 yard
pieced border - red- 3/4-yard, pink - 1/2-yard, light green- 1/2-yard, light blue- 3/4-yard
orange- snowman noses
scrappy hats- 10 plus fat quarters or a combination of fat quarters and fat eights in a variety of colors such as red, blue, yellow, pink, green, purple. 

Now let's get stitching!

Snowman Hat Rectangle- Sew a background 2” square onto the top two corners right sides together corner to corner. Trim excess fabric leaving a ¼” seam. Press.


Trace 2 noses onto the paper side of the Heat N bond fusible web. (Or whatever fusible brand you prefer) Iron onto the back side of the orange fabric. Cut out all the carrot noses. Iron on carrot nose onto the snowman block using the quilt on the front cover for placement. Applique stitch using orange or brown thread around the raw edges of the carrot design. I like to use a small buttonhole stitch.

We will wait until the quilt is completed and then quilted before we put on the snowman faces, which will use either buttons or yo-yos.
 
Tell your friends! Spread the word! Post the button on your blog!

 Each month's pattern is a free PDF instant download. If you miss a month, the patterns are available for $2.50 on my website and also in my Etsy shop.  


If you don't have a printer, you can purchase a PRINTED copy of the monthly patterns.

 There's also a Facebook Group, please join and post your progress! It's also fun to see everyone else progress too! Make sure to post your blocks so far! 

I'm now off to my flower list for when I go to the greenhouse. Then I'm planning on watching some Great British Baking Show and doing some embroidery. I hope that you have a wonderful day and find some time to stitch.

Have a wonderful day,
Cindy and Josephine
Eleanor 'Ellie'

Sunday, April 21, 2024

April Showers Blog Hop!

Happy Monday! Today is the first day of the April Showers Blog Hop Challenge! So glad that you are here, I hope that you have fun hopping around and seeing all the quilty fun. We have had our share of rainy weather, but we have also had some cold days too where we are lighting the fireplace and looking for our winter sweaters! Today it's a bit warmer and I'm happy to say we might make it into the 60's. I did break down and buy some pansy pots for my front entryway, but I have been having to watch the temperatures so that they don't freeze! My daffodils are blooming so I know spring will soon be here. For my project I designed a sweet highland cow adorned with flowers. This sweet cow is also spending time picking flowers from the farmers garden too! It's a fun springtime design and looks adorable on display in my kitchen. It took me an afternoon to stitch together using some scrap fabric from my bits and pieces basket... let me show you how I put it together.

I traced the Highland Cow pieces onto the paper side of my fusible web. I like to use flexifuse since it does not gum up my machine. Then I iron the shapes onto the wrong side of my fabric scraps and then cut them out using my applique scissors. Following the manufacturer's directions I iron everything in place to form the cow design.

Once everything is fused in place, I machine stitch around all of the raw edges using brown thread and a buttonhole stitch. To finish my design I raided my button jar and found the perfect buttons for the cow's eyes and flower centers.
 
~ Highland Cow ~

I think it's super cute on display on my cupboard door.

If you want to make a Highland Cow of your own, it can be found in my Etsy Shop and also on my website as a PDF download.

April Showers may bring May flowers, but this year our second granddaughter waited until April to be born, (she was due in March) So she is our sweetest little April baby! We are smittened with her and can't wait to watch our two granddaughters grow and play together. 


I hope that you have a wonderful day and spend some time stitching. Make sure to leave a sweet comment and visit all of today's blogs. The list is below.

Happy quilting,
Cindy and Josephine


Monday April 22

Friday, December 1, 2023

December's Here!


Happy December! It's hard to believe that the end of the year is almost here! There is so much to do this time of year. I haven't gotten my tree or any of the decorating done yet. Hubby did his part; I came home thanksgiving weekend to a beautifully decorated house all lit up with the Christmas lights. He always waits until after thanksgiving to put up the lights. It's such a treat to come home to see the Christmas lights on. I have to say, I did get the front porch decorated with pine boughs and dogwood once the Christmas wreath arrived. I'm planning on getting the inside of the house done this weekend. I'm going to need some help hoisting the tree boxes upstairs. 

It's also time to wrap up our yearlong project with a big red bow. But first there's some more to do on it. It's going to be a lengthy post so grab a cup of coffee and let's get started. Make sure you head on over to Quiltdoodledesigns.com and download the pattern. It's free the month of December. Gather your fabrics, try to work from your scraps from the previous blocks if you can. I have also added a few fabrics from my fabric stash. Those of you who got the kits may want to do this also. 


Grab your .... and to all a goodnight section and applique the cozy cottage on it. Trace out one set of the snow-covered cabin shapes onto the paper side of the fusible interfacing. Group shapes that share the same color fabric. Press onto the wrong side of the fabric. Cut out the shapes, peel off the paper backing and place the shapes fusible side down on the right side of the blue background strip, centering the design onto the ... and to all a goodnight panel. Press shapes in place following the fusible manufacturer's directions. Stitch around the raw edges of the applique using either a straight stitch or buttonhole stitch. If you're unsure of your stitch size, practice on some scrap material until you find the setting that you want to use for the machine applique. The snow can be made using white buttons or small yo-yo's. These will be attached after the quilt is quilted.


Sew the small 7" x 7" tree and gold house blocks together to make a long strip as pictured above. Press. Strip will measure 7" x 52 1/2". Applique the moose and jumping dog onto the strip as pictured below.

From blue fabric cut:
    6- 2 1/2" x WOF strips   WOF=width of fabric

Sew 2 of the strips together end to end, press. Then cut 1 - 2 1/2" x 52 1/2" strip

From the remaining blue strips cut:
    12 - 2 1/2" x 8 1/2" strips


Sew the large 8 1/2" x 8 1/2" tree and green house blocks together with a 2 1/2" x 8 1/2" sashing rectangle in between each block and on each end as shown above. Press. Strip will measure 8 1/2" x 52 1/2".


Sew the large 8 1/2 x 8 1/2" tree and red house blocks together with a 2 1/2" x 8 1/2" sashing rectangle in between each block and on each end as shown above. Press. Strip will measure 8 1/2" x 52 1/2"


Then sew the house sections together with the 2 1/2" x 52 1/2" strip in between and then sew this section to the .... and to all a goodnight section as shown above. This is then a great time to do some more embellishment if you want to. Add the snowman and snowdrift applique pieces as shown. Remember the falling snow won't be added until the quilting is complete. 


Then sew the stars strip and the Merry Christmas to all section together, press and then add it to the top of the house section. Press again. Then it's time to add a cheery red border and layer your quilt with batting and backing and quilt as desired.

When you are completed with the quilting then it's time to embellish your quilt with snowflakes using either buttons or white fabric yo-yo's. Embroider a face onto your snowman, eyes and jingle bells to your reindeer and Santa's eyes. Have fun embellishing! Those added touches add to the quilt.

I'm still quilting my Santa's Journey quilt and I'll do a big reveal in a week or two. I'm planning on using my quilt as a wall hanging to adorn my dining room. It'll be so much fun to put on display.

Finished measurements of the 2023 BOM quilt will be 60" x 70"

 Each month's pattern is a free PDF instant download. If you miss a month, the patterns are available for $2.50 on my website and also in my Etsy shop.  


If you don't have a printer, you can purchase a PRINTED copy of the monthly patterns.

 There's also a Facebook Group, please join and post your progress! It's also fun to see everyone else progress too! Make sure to post your blocks so far! I've had to change postings to be approved since I'm getting lots of spam posted on the Facebook page. 

I have also been posting time lapse videos on my Instagram feed on how to stitch the blocks together. @quiltdoodledesigns. I hope that you all have a wonderful day and find some time to do some stitching! I'm looking forward to seeing your quilt too! Remember to post pictures and tag me! 

There will also be a new BOM starting January 1st.... stayed tuned for the details.

Happy quilting,
Cindy and Josephine


Tuesday, October 31, 2023

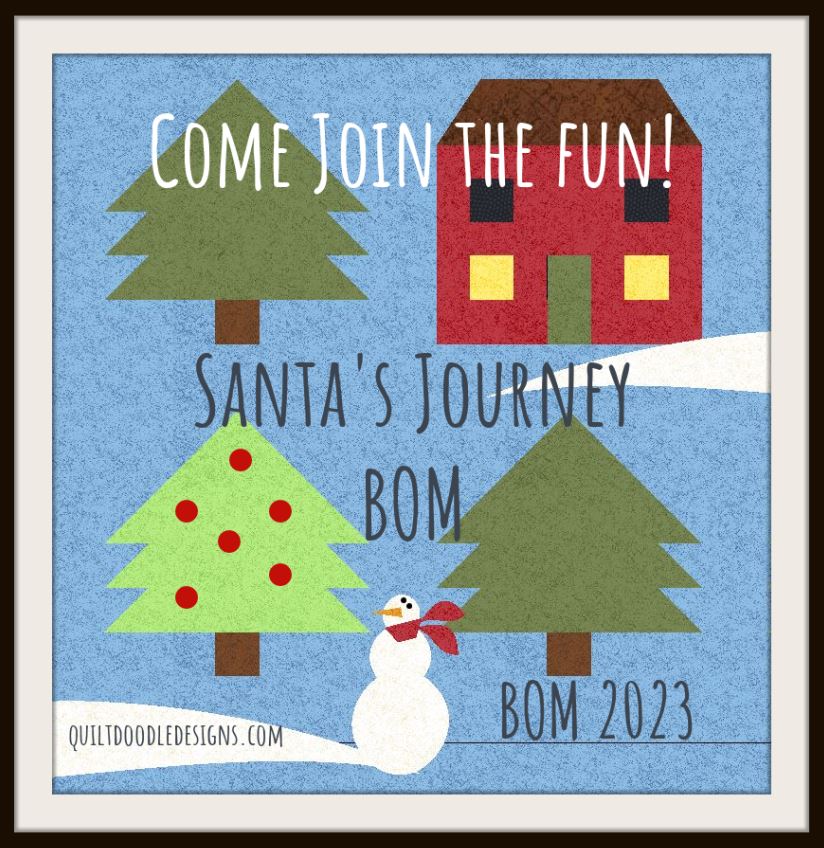
November's Block Santa's Journey BOM


Happy November last night was a lot of fun. I love Halloween! It was fun to see all of the trick or treaters out and about even though it was a cold evening with remnants of our overnight snowfall. Yes, we woke up to snow yesterday morning! I made my traditional mummy meatloaf and a Jack Skellington pumpkin pie for my family. It was pretty good.  Now onto this month's section of the quilt. I decided to split up this month's planned sewing into two. So, the final applique sections will be out December 1st. There is a section that can be pre-sewn together and I will go over that in this blog posting for those of you who want to get a head start on sewing. This month we will be doing a Santa and his reindeer applique onto the Merry Christmas to all... panel. 

Make sure you head on over to Quiltdoodledesigns.com and download the pattern. It's free the month of November. Gather your fabrics, try to work from your scraps from the previous blocks if you can. I have also added a few fabrics from my fabric stash. Those of you who got the kits may want to do this also. 

After you print up the applique pattern, trace the shapes to the paper side of your fusible web.

Following the manufacture instructions, iron onto the back side of the fabric grouping shapes that will use the same color fabric. Then cut all the shapes out.

You will lay these shapes out onto the Merry Christmas to all fabric panel. (Here's a big sneak peek at what the finished quilt will look like. 

Peel the paper backing off your shapes and lay them out onto the 'Merry Christmas to all...' panel. Some of the shapes will overlap. 

Following the pattern directions position the four reindeer onto the panel. Once you are happy with the placement of the design, iron in place.

The finished design will be embellished with fabric yo-yo snowflakes and buttons. I advise that you wait until your quilt is quilted before you add the 3-dimensional embellishments. you can stitch around the edges of the design with a buttonhole or satin stitch if you want. I recommend doing this if you plan on using this quilt.

When your quilt is quilted, the reindeer can be embellished with embroidery or buttons to add extra details. I'm planning on using buttons on my quilt.

If you'd like to sew ahead, piece the small trees and small gold house together as pictures. Sew the blocks together using a 1/4" seam. Iron.


Finished measurements of the 2023 BOM quilt will be 60" x 70"

 Each month's pattern is a free PDF instant download. If you miss a month, the patterns are available for $2.50 on my website and also in my Etsy shop.  


If you don't have a printer, you can purchase a PRINTED copy of the monthly patterns.

 There's also a Facebook Group, please join and post your progress! It's also fun to see everyone else progress too! Make sure to post your blocks so far! 

I have also been posting time lapse videos on my Instagram feed on how to stitch the blocks together. @quiltdoodledesigns. I hope that you all have a wonderful day and find some time to do some stitching! Next month we will finish up the applique onto our quilt blocks and also assemble our quilt.

Happy quilting,
Cindy and Josephine
The Jack Skellington pumpkin pie I made for Halloween.


Sunday, October 8, 2023

Mondays With Marcus- Big Apple Edition!


Little Italy
It was a thrill to go to New York City and visit my Marcus Fabrics family and see behind the scenes all of the people that bring my fabric ideas to life. It was exciting to meet with everyone, make some memories, and do some brainstorming for upcoming Quilt Doodle fabric lines and go thru the Marchives (Marcus Fabrics Archives) and dream of some future quilts. Tracy, Lora Lisa and I enjoyed hanging out together and visiting. It was such a pleasure to talk in person instead of over a zoom call. Since Covid I have missed going to Quilt Market and the opportunity to meet in person with Pati, Monika and Kristen. I really have missed the collaboration with fellow designers. This trip was wonderful and was uplifting in so many ways. Our Marcus Family were wonderful hosts and it's always a pleasure to work with them! Thank you, Pati, Monika and Kristen! It was awesome to see the behind the scenes at the Marcus office and meet everyone that makes my ideas into beautiful fabric.

Going thru the Marchives
For me, I've dreamed of returning to NYC for years, I was once a New Yorker, my family moved to Orange County to the town of Warwick. We drove from Houston Texas to Warwick leaving on New Year's Day 1969. We arrived in New York state during a Nor'easter. I had never seen snow before, every time my dad would turn on the windshield wipers my two-year-old sister, Stef would let out a blood curdling scream. It was a long drive... I was seven years old. My parents first stop was to Gimbles Department store to buy, boots, coats, mittens, hats, gloves, the whole works! We then settle into a motel in town. It would be our home for three months while our new home was being built.

Anne and Sal
 One of my fondest memories is the day my dad and I built a snowman in the front of the hotel. This is where I get my inspiration for my project, my first snowman. We built it on top of the plowed snow bank from the street on the edge of the parking lot. My snowman greeted everyone who passed by! 

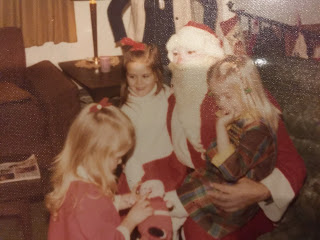
I also have many fond memories of New York and New York City. When we moved into our new home we were greeted by our new neighbors, Anne and Sal, an Italian couple who moved to the suburbs to retire. They introduced us to homemade Italian food and soon became our adopted grandparents. We fondly call them Nana and Uncle Sal. I remember Uncle Sal surprised us Christmas Eve playing Santa Clause, of course I knew it was Uncle Sal and we loved that he stopped by to bring some Christmas cheer! 
Anne and Sal also invited us to a trip to Little Italy in New York City. I remember that they were looking for drapery material to make curtains for their home. So, when I had a chance to see Little Italy again, I was thrilled! It was what I remembered it to be. 
Santa!
While visiting New York I made sure to have all my favorite Italian foods. Growing up in New York there were countless field trips to the city. Radio City Music Hall, Times Square, New York Stock Exchange, Metropolitain Musuem of Art and Empire State Building. I remember the street venders and the NY pretzel, and Italian Ice. I remember seeing the Twin Towers being built, seeing them from a bus window as we drove to and from our field trips. Visiting the 911 memorial was on top of my list of places to visit. I had a child's memory of
Stef and I with one of our many snowmen.
the city. I was nervous and excited to go to New York City. For me, when I arrived it felt like home. It brought back memories of my childhood. I took an extra day to explore the city and was able to go to the 911 memorial and museum. It's a must see if you go to NYC. Hubby and I walked everywhere, we had Italian ices, took a ferry ride to the Statue of Liberty. Ate some NY pretzels and ended our night with a pizza. Even though my family moved away when I was 15, I will always be a New Yorker at heart. New Year's Eve isn't complete without the ball dropping and
Kristen and Pati
hearing Frank Sinatra sing 'New York, New York'. 

Now, back to my project for this week's Mondays with Marcus. I have a table runner featuring my Snowfolks strip it fabric and Marcus Fabrics  Lanacot wool. The table runner has a sweet snowman peeking over the edge on one side. The Strip It fabric makes it easy to make a scrappy coordinating table runner without having to search for all the fabric to make it scrappy. Let me show you how I put this wintery themed project together. First, you'll have to go over to my website and download the free PDF pattern. It can be found HERE.
~ New York Snowman ~

Following the directions on the pattern, cut 3 4 1/2" x WOF strips.

Then fussy cut the strips into 8 4 1/2" x 4 1/2" squares. You will have a total of 24 squares. Then cut 3- 4" x WOF strips from the strip it fabric. Then fussy cut the strips into 4" squares from each fabric pattern in the strip. Then sub cut the squares into 4- 2" squares from each.

Pair the 4" squares with the 2" squares. Alternating light and dark fabrics. There will be 4 2" squares for each 4" square. 

Put a 2" square on the corner of 4" square with right sides together. Sew the corner square diagonally from corner to corner. Repeat on all remaining corners.

Trim the excess fabric to 1/4" from the stitching line to form a 1/4" seam. Press. Make a total of 24 snowball blocks.

Lay the blocks out to form a three by eight block strip making sure to dispurse the fabrics evenly across the table runner top. Sew the snowball blocks together with a 1/4" seam and press.

Trace out the snowman shapes onto the paper side of the fusible interfacing. Press onto the wrong side of the fabric squares (gold- star, red – hat, orange – carrot nose, and white- snowman face) 


Cut out the shapes, peel off the paper backing and place the shapes fusible side down on the right side of scrappy snowball pieced rectangle. Some of the shapes will overlap. Press shapes in place following the fusible manufacturer’s directions.  The bottom part of the snowman face will line up with the edge of the scrappy snowball rectangle.

Stitch around the raw edges of the applique using either a straight stitch or buttonhole stitch.

I color matched the thread for stitching around the wool shapes.


Following the directions, you'll add the navy-blue border and then make a quilt sandwich. (Layer the table runner with the backing and batting) Then quilt as desired! Then I square the table runner up and add the binding. Before you know it, you'll have a New York Snowman table runner. All ready for gift giving or to adorn your home this winter. The FREE pattern can be found. 


At this same link you can find a printed version of the PDF pattern for a small fee along with color coordinated kits featuring my Snowfolks Strip-It fabric for purchase.

I hope that you enjoy my New York Snowman and hearing about my New York City adventures. I will go back in a second!

Happy Quilting!
Cindy & Josephine