Showing posts with label flowers. Show all posts

Thursday, August 1, 2019

August's Block~ Sunshine!


http://www.quiltdoodledesigns.com/BOM-2017.html
Happy August! Summer sure is flying by isn't it! Just got back from a tiny vacation I took with mom to North Dakota to meet her 'California' cousins and see her last surviving uncle. I was hoping to see some sunflower fields while we were there but, alas, no sunflowers. I remember sunflower fields that would go on for miles back in the 70's, but I guess the farmers aren't growing them much anymore. We enjoyed driving out to the old homestead where my grandparents lived and driving by the old school house where mom went to school. It was a beautiful sunny day, not a cloud in the sky.

This month's block will be challenging. It's the hardest block in the quilt but it is also my favorite block. This block combines traditional piecing, paper piecing and 'applique'. Let me show you how I made this month's block. It is helpful to save all of your leftover bits of white (background) fabric and see if any of it can be used in the paper piecing of the suns rays of sunshine sections. Any strips of yellow that are leftover from the quilt so far work well for the paper piecing also.
To begin with, print up your pattern pieces and gather up your fabric scraps that will be useful for the paper piecing. Remember paper piecing feels totally opposite of normal piecing. If you are unfamiliar with paper piecing I would watch a couple of videos or tutorials before you begin.

Following the directions. Layout your orange and yellow 2 1/2" squares to form a nine patch block and sew them together. Iron and set aside.

·         Cut the foundation/paper pieces out, do not cut directly on the outer section edge. Leave roughly a 1/8 – ¼” edge. We will trim it up later.
·         Position the fabrics right sides together on the blank/unmarked side of the foundation paper with the edge of the fabric ‘past’ the seam line on the foundation paper. (It helps to hold your paper piece and fabric up to the light to see if it lines up)
·         Stitch on the sewing line between the numbers using a very small stitch. (1.5)


·         Continue stitching in numeric order until the sunshine rays section is completed. Trim away the fabric so that it is even with the outside line of the foundation section.


·         Make four sunshine ray sections. Sew them together, this will form the outer rays circle for the sunshine.
·         Remove foundation paper.


·         Sew a 1/8th stitch around the center and outer edges of the circle.


·         Fold the inner edge under ¼” and press. Position the inner circle on top of the nine patch square and stitch in place using a blind stitch.

I pinned it in place before I did the blind stitch.

On the back side, trim away the excess fabric on the nine-patch block center.


·         Fold the outer edge under ¼” and press. Position the sunshine section on top of the 12 ½” x 12 ½” square and stitch in place using a blind stitch.


I pinned it in place before I did my blind stitch.

The block measures 12 1/2" x 12 1/2" with the seam allowance.

~Sunshine~

The monthly FREE pattern will be available on my website. I have a special 2019 BOM section on my website. Each month the FREE pattern will be posted. But as soon as the new section or block is out the old block pattern will no longer be a freebie. But it will still be available for a small fee on my website or in my Etsy shop. If you want to share your finished blocks, feel free to post them on Facebook Group (Quilt Doodle Designs Garden Sunshine BOM 2019) and tag me or post them on Instagram tag Quilt Doodle Designs. I love to see everyone's progress as we stitch along together. 
As a reminder... if someone asks for the PDF or where it is on the Facebook group, please do not post the PDF directly onto the site. I appreciate you referring them to my website or to the blog. Thank you!

This month's block is challenging but worth the effort! Hope you are having a great day, remember July's block is no longer FREE. It can be found in my ETSY shop and also on the Quilt Doodle Website for a small fee. To get this month's block, head on over to Quilt Doodle Designs... remember this block is only available this month as a FREE PDF download. 

Happy Quilting!
Cindy and Belvedere

Sunday, May 19, 2013

A Day Of Gardening...

It has been a day of gardening while my husband strips wallpaper off the mud room walls. My youngest is graduating this year, providing he passes this one class... he's keeping us in suspense... gotta love him. As I plan everything to be in his school colors, I'm hoping he's turning in his late work. Yesterday I got his senior poster done and his Grad announcement/invitations ready to be ordered from Shutterfly. I feel like I'm somewhat organized. Today was the perfect day to relax and garden.

I've always wanted to make a terrarium. This was a lot of fun to put
together. Yup, that's 'Sandy' from Sponge Bob.... I  couldn't
resist putting it in the bowl. It made me chuckle....

Another look at my succulent arrangement.

The view from above....

I also replanted my pineapple plant into a larger pot.

I planted this planter for outside on my deck.  Red and White.... red impatiens and Diamond Frost.
I think it'll look nice once it fills in a bit.

I know it looks sparse right now. I'm hoping it will fill in and look beautiful by
June 29th, when we are having Thomas' open house.
I found this on Pinterest.... this is what I'm hoping my red and white pots will look like....

The only pot that doesn't look goofy is this lovely
Martha Washington Geranium that I got from my
mom and dad on Mother's Day. My dad made the birdhouse
for me many years ago. Many wrens have raised babies in it.
I hope that you are having a wonderful day and finding some time to relax...

Happy quilting  Gardening,

Tuesday, February 5, 2013

Rosie Posies...

What do you do with those ring dilly dally's from the orange juice or milk containers?  I used to throw them away until I found one and played around with it thinking... this could be a ring. In fact, if I were 6 again, I would be gluing gems to them and prancing around the house dressed as a princess wearing my mom's high heels with a blankie tied around my waist.  Well, I can't get away with that anymore.... maybe when I'm a bit older and senile I can...  but I can glue a yo-yo flower to it and make it a pincushion ring! Doesn't that sound like a fun idea! So here's a quick tutorial on making my Rosie Posie pincushion ring.

You will need some fabric scraps, thread, 30 mm yo-yo maker
and a 45 mm yo-yo maker and some  batting.

First make a yo-yo using the 45 mm yo-yo maker....

Then make a yo-yo using the 30 mm yo-yo  maker.
Before you sew it closed, stuff it with some batting.

Sew it to the '45 mm' yo-yo.

You've made a cute Rosie Posie!

Score the plastic disk of  your plastic ring using the point of
a scissor or pin....

Hot glue your Rosie Posie to the disk.

Ta-da! A pincushion ring!  Isn't it cute?

It even looks cute sitting in my thread basket!
I would like to make a bunch of these up for my next quilt retreat outing.  They would make cute little gifts to give to my fellow quilters! Ok boys, start drinking up that milk and orange juice! I need a few more plastic thingies! I want to make about a dozen of these!

Happy quilting!


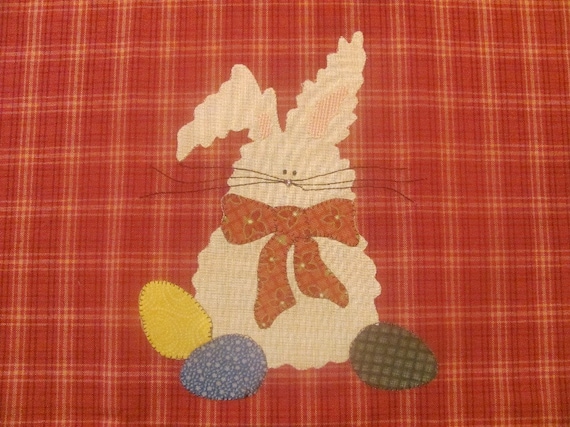
Fluffy Bunny Applique PDF Pattern for Tea Towel or Quilt Square From Quilt Doodle Designs
Fluffy Bunny #211
Do you have Spring Fever? I sure do.... here are some fun Spring Patterns from Quilt Doodle Designs.
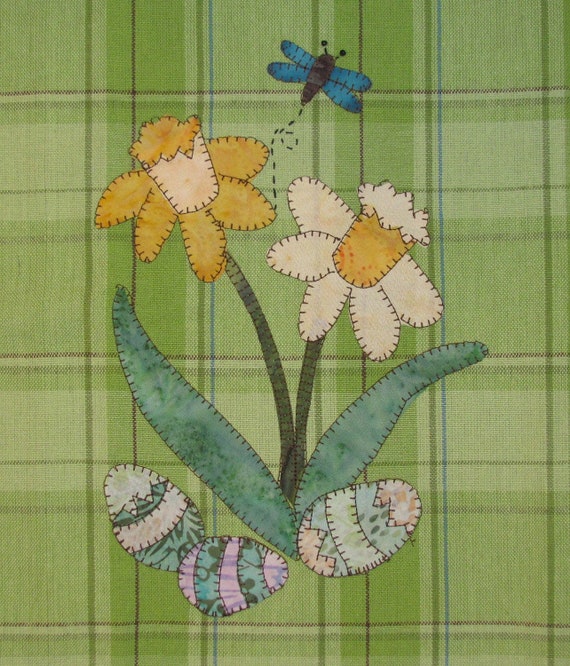
Spring Daffodils Applique PDF Pattern for Tea Towel
Spring Daffodils #219

Friday, August 24, 2012

It's a Blog Hop Party! Give-Away too!

Blog Hop Party with Give-Aways Welcome!  I have been having so much fun this summer participating in Blog Hops that I jumped at the chance to be involved in this one too!  Thank you Quilters Gallery for hosting such a fun hop! For a quick and easy project I thought I would show you how I made a coffee cup cozy.... first you'll have to go to your favorite coffee shop and get one of those cardboard coffee cup cozy thingies... Doesn't matter what shop, we all have our favorites and I'm not going to judge, coffee in my book is awesome no matter where you get it and if someone else is making it, even better! Now, while enjoying that cup of coffee, dig through your scraps  and find some fun fabrics to work with for your coffee cozy.....

Use your paper coffee cup holder use it for your template. After tracing your template onto a piece of paper, measure it on your travel mug to see if it will fit.  Add to it if you need to...

Using my 'Spring Bloom' pattern, I embellished my template with flowers and a bumble bee.  Trace the flowers and bee onto heat n bond.

Using your paper template cut out the front of your coffee cozy adding seam allowances, I had to add a bit extra for mine.

Iron your heat n bond onto your flower and bee fabrics then cut out.  Iron bee body & flowers onto front of the coffee cozy. (Remember the bee's wings and flower centers will be added later)

With right side together layer front and back of coffee cozy onto batting.

Sew 1/4" on each end, trim.

Turn right side out, pin, trim top and bottom. It's time to machine applique!  After applique is done, you can also quilt the coffee cozy if desired.  I felt the appliqueing was enough.

Sew binding to top and bottom of coffee cozy using a 2" strip folded in half.

Time to embellish with yo-yo's and bee's wings following the 'Spring Bloom' pattern for directions.

Add on Velcro or closing of your choosing.  A button and loop closure would be cute too!

All done!  Isn't it cute!  I love it!!!

For the Blog Hop Party, Wilson and I will be giving away a 'Spring Blooms' packaged pattern to two lucky winners,  so that they can make this adorable coffee cozy, or a fun tea towel !

To WIN all you need to do is leave me a comment telling me how you like your coffee.  I love my coffee black, but my sis likes cream and tons of sugar.  Do you like flavored or plain coffee?  Or do you prefer tea?  To get a second chance, let me know if you are a follower.  Remember if you are a no-reply blogger, leave me your email address so that I can contact you! Wilson and I will pick a lucky winner on September 3rd.

Have fun hopping around, the complete list can be found at Quilters Gallery!
Hopping begins August 25th  and runs through September 3rd.

Happy quilting and perfect stitches to you,
Spring Blooms can be found HERE as an instant download ...