Showing posts with label wool applique. Show all posts

Sunday, October 8, 2023

Mondays With Marcus- Big Apple Edition!


Little Italy
It was a thrill to go to New York City and visit my Marcus Fabrics family and see behind the scenes all of the people that bring my fabric ideas to life. It was exciting to meet with everyone, make some memories, and do some brainstorming for upcoming Quilt Doodle fabric lines and go thru the Marchives (Marcus Fabrics Archives) and dream of some future quilts. Tracy, Lora Lisa and I enjoyed hanging out together and visiting. It was such a pleasure to talk in person instead of over a zoom call. Since Covid I have missed going to Quilt Market and the opportunity to meet in person with Pati, Monika and Kristen. I really have missed the collaboration with fellow designers. This trip was wonderful and was uplifting in so many ways. Our Marcus Family were wonderful hosts and it's always a pleasure to work with them! Thank you, Pati, Monika and Kristen! It was awesome to see the behind the scenes at the Marcus office and meet everyone that makes my ideas into beautiful fabric.

Going thru the Marchives
For me, I've dreamed of returning to NYC for years, I was once a New Yorker, my family moved to Orange County to the town of Warwick. We drove from Houston Texas to Warwick leaving on New Year's Day 1969. We arrived in New York state during a Nor'easter. I had never seen snow before, every time my dad would turn on the windshield wipers my two-year-old sister, Stef would let out a blood curdling scream. It was a long drive... I was seven years old. My parents first stop was to Gimbles Department store to buy, boots, coats, mittens, hats, gloves, the whole works! We then settle into a motel in town. It would be our home for three months while our new home was being built.
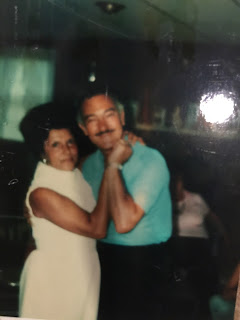
Anne and Sal
 One of my fondest memories is the day my dad and I built a snowman in the front of the hotel. This is where I get my inspiration for my project, my first snowman. We built it on top of the plowed snow bank from the street on the edge of the parking lot. My snowman greeted everyone who passed by! 

I also have many fond memories of New York and New York City. When we moved into our new home we were greeted by our new neighbors, Anne and Sal, an Italian couple who moved to the suburbs to retire. They introduced us to homemade Italian food and soon became our adopted grandparents. We fondly call them Nana and Uncle Sal. I remember Uncle Sal surprised us Christmas Eve playing Santa Clause, of course I knew it was Uncle Sal and we loved that he stopped by to bring some Christmas cheer! 
Anne and Sal also invited us to a trip to Little Italy in New York City. I remember that they were looking for drapery material to make curtains for their home. So, when I had a chance to see Little Italy again, I was thrilled! It was what I remembered it to be. 
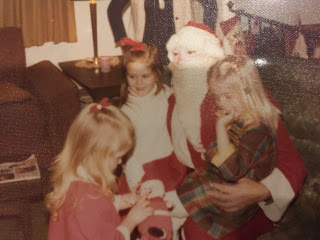
Santa!
While visiting New York I made sure to have all my favorite Italian foods. Growing up in New York there were countless field trips to the city. Radio City Music Hall, Times Square, New York Stock Exchange, Metropolitain Musuem of Art and Empire State Building. I remember the street venders and the NY pretzel, and Italian Ice. I remember seeing the Twin Towers being built, seeing them from a bus window as we drove to and from our field trips. Visiting the 911 memorial was on top of my list of places to visit. I had a child's memory of
Stef and I with one of our many snowmen.
the city. I was nervous and excited to go to New York City. For me, when I arrived it felt like home. It brought back memories of my childhood. I took an extra day to explore the city and was able to go to the 911 memorial and museum. It's a must see if you go to NYC. Hubby and I walked everywhere, we had Italian ices, took a ferry ride to the Statue of Liberty. Ate some NY pretzels and ended our night with a pizza. Even though my family moved away when I was 15, I will always be a New Yorker at heart. New Year's Eve isn't complete without the ball dropping and
Kristen and Pati
hearing Frank Sinatra sing 'New York, New York'. 

Now, back to my project for this week's Mondays with Marcus. I have a table runner featuring my Snowfolks strip it fabric and Marcus Fabrics  Lanacot wool. The table runner has a sweet snowman peeking over the edge on one side. The Strip It fabric makes it easy to make a scrappy coordinating table runner without having to search for all the fabric to make it scrappy. Let me show you how I put this wintery themed project together. First, you'll have to go over to my website and download the free PDF pattern. It can be found HERE.
~ New York Snowman ~

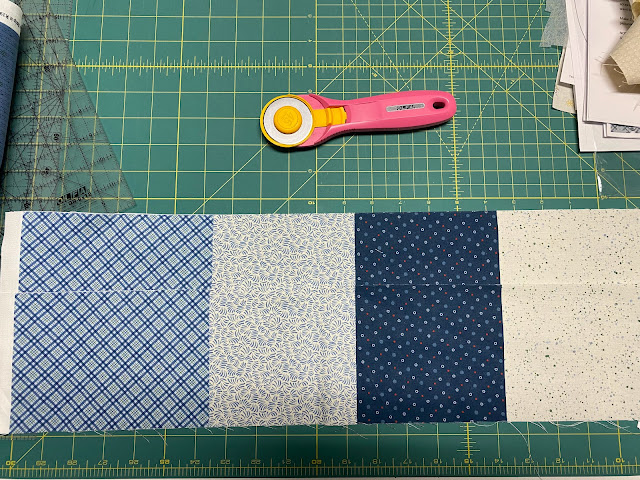
Following the directions on the pattern, cut 3 4 1/2" x WOF strips.

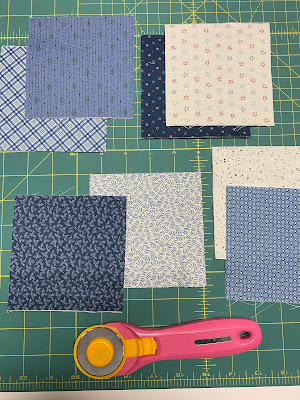
Then fussy cut the strips into 8 4 1/2" x 4 1/2" squares. You will have a total of 24 squares. Then cut 3- 4" x WOF strips from the strip it fabric. Then fussy cut the strips into 4" squares from each fabric pattern in the strip. Then sub cut the squares into 4- 2" squares from each.

Pair the 4" squares with the 2" squares. Alternating light and dark fabrics. There will be 4 2" squares for each 4" square. 

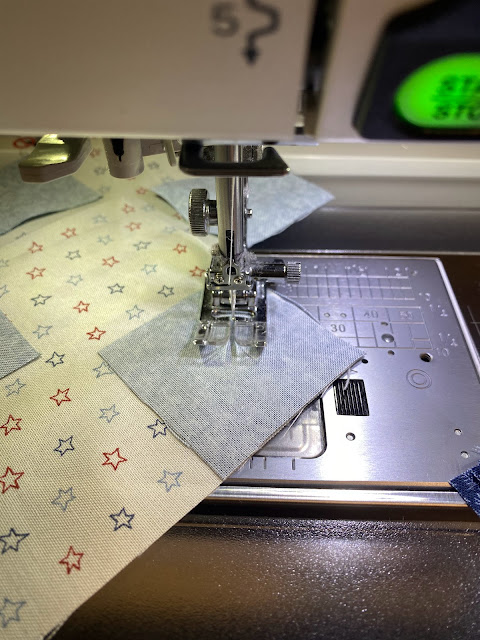
Put a 2" square on the corner of 4" square with right sides together. Sew the corner square diagonally from corner to corner. Repeat on all remaining corners.

Trim the excess fabric to 1/4" from the stitching line to form a 1/4" seam. Press. Make a total of 24 snowball blocks.

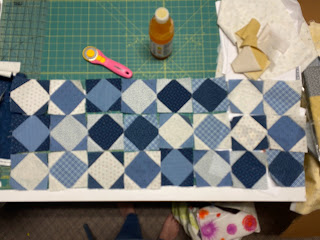
Lay the blocks out to form a three by eight block strip making sure to dispurse the fabrics evenly across the table runner top. Sew the snowball blocks together with a 1/4" seam and press.

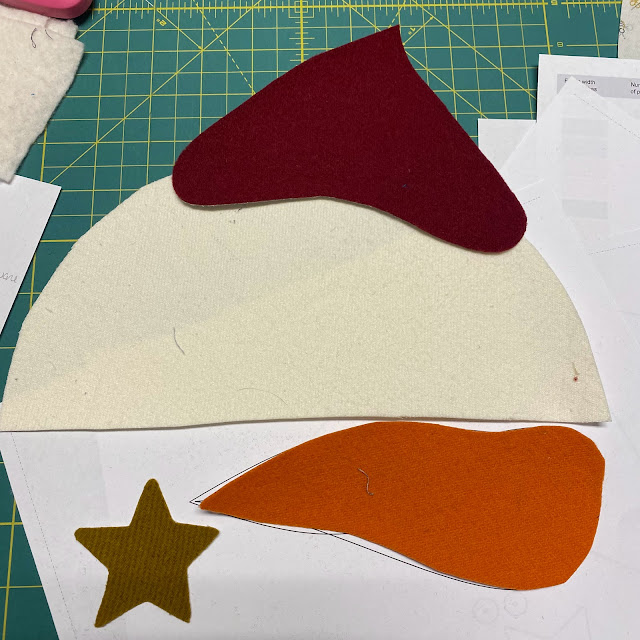
Trace out the snowman shapes onto the paper side of the fusible interfacing. Press onto the wrong side of the fabric squares (gold- star, red – hat, orange – carrot nose, and white- snowman face) 


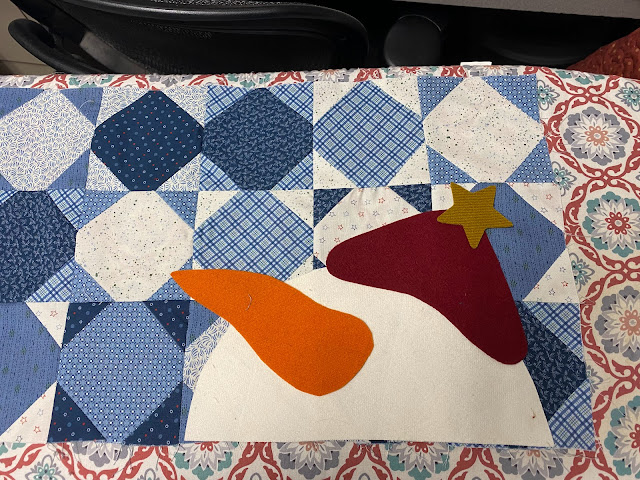
Cut out the shapes, peel off the paper backing and place the shapes fusible side down on the right side of scrappy snowball pieced rectangle. Some of the shapes will overlap. Press shapes in place following the fusible manufacturer’s directions.  The bottom part of the snowman face will line up with the edge of the scrappy snowball rectangle.

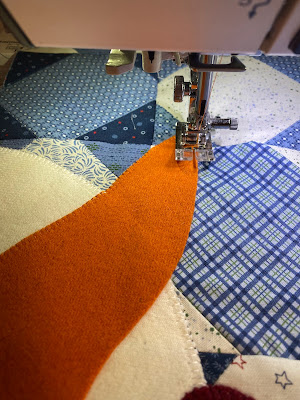
Stitch around the raw edges of the applique using either a straight stitch or buttonhole stitch.

I color matched the thread for stitching around the wool shapes.


Following the directions, you'll add the navy-blue border and then make a quilt sandwich. (Layer the table runner with the backing and batting) Then quilt as desired! Then I square the table runner up and add the binding. Before you know it, you'll have a New York Snowman table runner. All ready for gift giving or to adorn your home this winter. The FREE pattern can be found. 


At this same link you can find a printed version of the PDF pattern for a small fee along with color coordinated kits featuring my Snowfolks Strip-It fabric for purchase.

I hope that you enjoy my New York Snowman and hearing about my New York City adventures. I will go back in a second!

Happy Quilting!
Cindy & Josephine


Friday, December 16, 2022

A Little Wool Chickadee


Yesterday afternoon I pieced together this sweet little chickadee. I love chickadees and watching them on my birdfeeders. They are sweet little birds and seeing them, reminds me of my dad. He loved watching and feeding the birds. I find working with wool to be both relaxing and challenging. Since I don't work with wool often, it's a fun challenge. I like the feel and weight of the wool fabric in my hands. Making this design, I pondered stitching little snowflakes but decided against it and stitched more pine boughs and add a more decorative border to the design. The finished size is 5 1/2" x 5 1/2" and is a perfect companion to the Woodland Deer ornament. I've got a few more to do to make a nice ornament set! These are also a great size for a coaster or just a little something to decorate with. This is just a perfect size to tuck in a Christmas Card to give to your friends and neighbors. Let me show you how I put this together...
I went thru my wool stash and picked out the colors and threads that I thought would work best for this design. I made copies of the ornament out shape, the circle and the petal circle to use as a template to cut those shapes out. After you cut the circle and petal circle out, do not fuse or sew them together yet! Set them aside until you are ready to use them.

To start out, download the pattern and trace the deer pieces onto the paper side of fusible web. I like to use Flexifuse, but heat n bond will also work. I also traced the circle shape for the ornament.

Rough cut your fusible shapes out and pair them with the different wool colors. Iron the fusible shapes onto the wool using the manufacturer's directions. and then cut them out using a pair of applique scissors.


Following the instructions, place the shapes onto the wool circle base and press in place following the manufacturer's instructions. Now your piece is ready to be appliqued! You can stitch this by hand using 3 strands of DMC floss, or a single strand of perle cotton. I am going to cheat a little bit and sew it by machine. Let me show you....

I am using a larger eyed machine needle... I'm using a 35 weight variegated cotton thread from Valdani.

I'm using a blanket stitch on my machine and I played around with it to get a sizing that I thought would work nicely with the design. I'm starting with a cream thread to stitch around the white on the chickadee.

Here you can see my stitching by machine, I used a brown thread to go around the branch and pinecone, and a dark variegated thread to go around the gray pieces.

Using a dark gray Perle cotton, I stitch details onto the bird's wing and tail using a backstitch. I stitch the bird's eye using a French knot.

With your fusible circle you cut out earlier, iron that onto the back of your blue stitched ornament piece.

 Peel off the paper and then fuse onto the green scalloped piece. I did most of my pressing from the backside of the ornament.

Then stitch around the edge of the circle. I handstitched a lazy daisy design around the edge of the circle using a cream variegated Perle cotton. It was well worth the effort! If desired, you can also hand stitch around the scalloped edge. To finish your ornament, attach a piece of baker's twine for the hanger.

~ Woodland Chickadee Ornament ~

I'm just tickled with how the ornament turned out. I'm looking forward to making some more! Working with wool was very satisfying, a delight to work with. Even though I did most of ornament with machine stitching, these would be beautiful handstitched too. You can use a blanket stitch or a whip stitch to stitch the edges. The finished size is 5 1/2" x 5 1/2". I'm hanging mine as ornaments, but the size is perfect for a coaster! 

The pattern is available as a PDF download or as a packaged pattern. Both versions can be found in the Etsy shop or in the Quilt Doodle Designs website.

We sure had a healthy dump of snow; we've been staying close to home and hibernating. The snow is very pretty, it looks like a Christmas card outside. Very pretty... great weather for watching TV and stitching. Josephine is not a fan of the wet damp snow, she hates getting her feet wet! She's also hibernating.

Happy stitching!
Cindy and Josephine

Tuesday, December 13, 2022

Playing with Wool


     Marcus Fabrics sent me some beautiful wool to play with and I sure have been having fun. I have dabbled in wool applique in the past. I enjoy it very much and have decided to use the wool to make some beautiful ornaments. I'll be sharing these designs with you over the next month and releasing new patterns to go with them. I'm very excited to expand my applique designs to wool. Many of us enjoy doing handwork while traveling or watching out favorite shows. These projects are very portable which is awesome! Let me show you how I made this adorable deer that is sure to be part of Santa's team. This is a good project if you are new to wool applique. 

To start out, download the pattern and trace the deer pieces onto the paper side of fusible web. I like to use Flexifuse, but heat n bond will also work. I also traced the circle shape for the ornament.

I made copies of the ornament out shape, the circle and the petal circle to use as a template to cut those shapes out.

Here are the ornament base pieces. Do not fuse or sew them together yet! Set them aside until you are ready to use them.

Rough cut your fusible shapes out and pair them with the different wool colors.

Iron the fusible shapes onto the wool using the manufacturer's directions. and then cut them out using a pair of applique scissors.

Following the instructions, place the shapes onto the wool circle base and press in place following the manufacturer's instructions. Now your piece is ready to be appliqued! You can stitch this by hand using 3 strands of DMC floss, or a single strand of perle cotton. I am going to cheat a little bit and sew it by machine. Let me show you....

I am using a larger eyed machine needle...

I'm using a 35 weight variegated cotton thread from Valdani

I'm using a blanket stitch on my machine and I played around with it to get a sizing that I thought would work nicely with the design.

I'm starting out using a brown thread to stitch around the deer.

Then I switched over to a white thread to stitch around the antlers.

Here you can see my stitching by machine, I still need to stitch around the deer's collar with some red thread.

I then am ready to do some hand stitching. Using a dark brown/black perle cotton I stitch the deer's eye using a french knot.

I then switch over to some white thread and stitch the snowflakes using french knots.

It's time to add some more embellishments...

I stitched on some tiny yellow/gold buttons onto the collar for some jingle bells. I then stitch the pine boughs following the pattern for placement. I'm using a green perle cotton and stitch using a straight stitch.

I then sewed three little red buttons onto the pine boughs for holly berries.

With your fusible circle you cut out earlier, iron that onto the back of your blue stitched ornament piece, peel off the paper and then fuse onto the green scalloped piece. Be careful ironing around the buttons. I did most of my pressing from the backside of the ornament.

Then stitch around the edge of the circle. I used my machine and a buttonhole stitch. This can also be handstitched too! If desired, you can also hand stitch around the scalloped edge. To finish your ornament, attach a piece of baker's twine for the hanger.

~ Woodland Deer ~

I'm just tickled with how the ornament turned out. I'm looking forward to making some more! Working with wool was very satisfying, a delight to work with. Even though I did most of ornament with machine stitching, these would be beautiful handstitched too. You can use a blanket stitch or a whip stitch to stitch the edges. The finished size is 5 1/2" x 5 1/2". I'm hanging mine as ornaments, but the size is perfect for a coaster! 

The pattern is available as a PDF download or as a packaged pattern. Both versions can be found in the Etsy shop or in the Quilt Doodle Designs website.

The weather is dreadful here, damp, cold.... it's raining. A perfect day to go do some sewing or stitching. I'm heading down to my sewing room and plan on making some more wool ornaments. I can't wait to show you my next one! 

Happy stitching!
Cindy and Josephine