Welcome! Today is my day for the See Ya Later, Alligator Blog Hop. It has been a super busy summer and it's hard to believe that fall is right around the corner! I just got back from a fun filled weekend of parties, a bridal shower for my nephew's sweetheart and a baby shower for our soon to arrive granddaughter! Such an exciting time for our families. In between all of the upcoming festivities I have a little weekend getaway planned for hubby and I this fall. Josephine also will be joining us! I have a cozy little cabin rented on the north shore of Lake Superior and we are looking forward to a relaxing weekend with some hiking. Hiking sounds ambitious, it's more like walking on some beautiful, paved trails. We're not sure how Josie will do, so this will be a very interesting trip. I'm also looking forward to bonfires, a little wine and walking along the lake, I'm told the shoreline we have access to is great for finding agates. We're looking forward to the quiet, away from the hustle bustle and traffic noise of where we live.
For the blog hop I made a simple zipper bag because I never have too many bags when I travel! It's the perfect size to hold a small project to work on while traveling. I'm not sure yet what I'll work on but I just know I'll use this bag.
 |
| I then cut the strips into 2 1/2" squares. |
 |
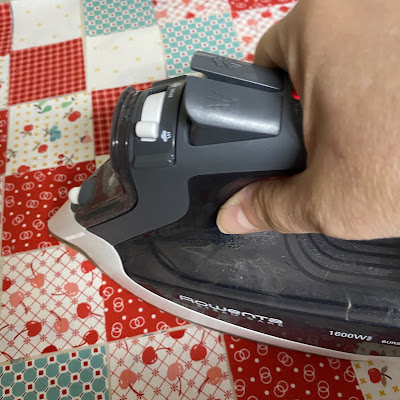
| I then gave my fabric pieced sheet a really good press. Now I had a wonderful, pieced square to make my bag with. I quilted my pieced square section and then made a simple zippered bag. |
 |
| I'm all ready to travel with my new project bag! I have my project notebook and notions all ready to go! |
I really liked the iron on interfacing technique for piecing my squares. I'm thinking of all the fun ways I could use it. It'd be a great way to make scrappy potholders. It would also be a great way to make blocks for a postage stamp quilt. I'm also thinking of trying it out to make granny square blocks for a quilt using all the 2 1/2" blocks I have been saving up from my scraps. I hope you have a chance to give this technique a try. It was sorta fun and something a little different than regular piecing.
I hope you have fun today hopping!
Happy quilting,
Cindy and Josephine
Monday, August 22nd
Tuesday, August 23rd
Quilt Doodle Designs (you are here!)
Wednesday, August 24th
Thursday, August 25th
Happy quilting,
Cindy and Josephine


Your project bag is really pretty. I am sure it will come in handy for something you need to travel with.
ReplyDeleteGreat idea! It's always nice to have a plan and a place to hold it!
ReplyDeleteWhat a clever way to sew those squares together! You made a pretty bag with them too! I bet it will be very useful. Thanks for sharing!
ReplyDeleteOh your tote bag is just the cutest. I LOVE the red! I just made a couple little holiday blocks using the same method. I found the kits on a quilt retreat. It was a really fun way to do things for a change. It also makes things a little heavier when it's all done and that's perfect for a tote bag. Your red rotary cutter is so cool, too!
ReplyDeleteoops, I wasn't signed into my account, it was me who made that comment! LOL!!
DeleteThank you for the great tips for interfacing piecing. I've spent so much time drawing lines on my interfacing and never thought to just lay it on my cutting mat. Brilliant! Your bag is adorable!
ReplyDeleteYour project bag is awesome! So pretty and so useful.
ReplyDeleteThat's a great technique. I've seen it using printed interfacing but yours is so much better since I have the interfacing and wouldn't need to buy something special. Thanks. A bag is the perfect travel companion.
ReplyDeleteI love your idea with the interfacing Cindy. Thanks a bunch
ReplyDeleteGreat idea using the interfacing. Thanks for the tutorial!
ReplyDeleteThat's a wonderful way to get those tiny blocks perfectly lined up and your fabric choices were so pretty. Such a fun bag to fill with necessities and hit the road! Thanks for sharing!
ReplyDeleteI have never done interfacing piecing by definitely will have to soon. Your project bag is so fun and pretty.
ReplyDeleteYour zipper bag turned out very cute. I have not done piecing this way, either. In fact, I did just piece squares the "matching seams" way. Zipper bags are so useful and fun, especially when you've sewn it yourself.
ReplyDeleteCool project! Thanks for sharing.
ReplyDeleteOne can never have enough zip pouches. Pretty and practical...well done.
ReplyDeleteI think this is the first time I've been to your blog! I like the bag. I've seen this technique used for those colorwash floral quilts, but this looks like a good use too!
ReplyDeleteI used that method year ago on a Christmas quilt and never think to use it again thanks for the nudge, I agree about never having enough pouches
ReplyDeleteZipper bags are so handy when travelling. Thanks for sharing your technique :)
ReplyDeleteI have seen that method using the 1 inch square interfacing. I even bought so years ago and then never got around to doing it. I love making zipper pouches.
ReplyDeleteGreat bag for traveling! Love the fabric you chose and the pattern is so cute! Thank you for the tutorial.
ReplyDeleteYour travel bag is beautiful!
ReplyDeleteLove your project bag! That way of sewing the squares together is my favorite, so much quicker! xx
ReplyDelete